Welcome to the QuickSet Installation Guide, where you’ll find all the information you need to install your system with ease.
With step-by-step video instructions, you’ll be able to efficiently and accurately install your system.
Before you start, be sure to watch the Best Practices video to ensure you’re using the product correctly. Get started now and experience the simplicity of the QuickSet installation process.
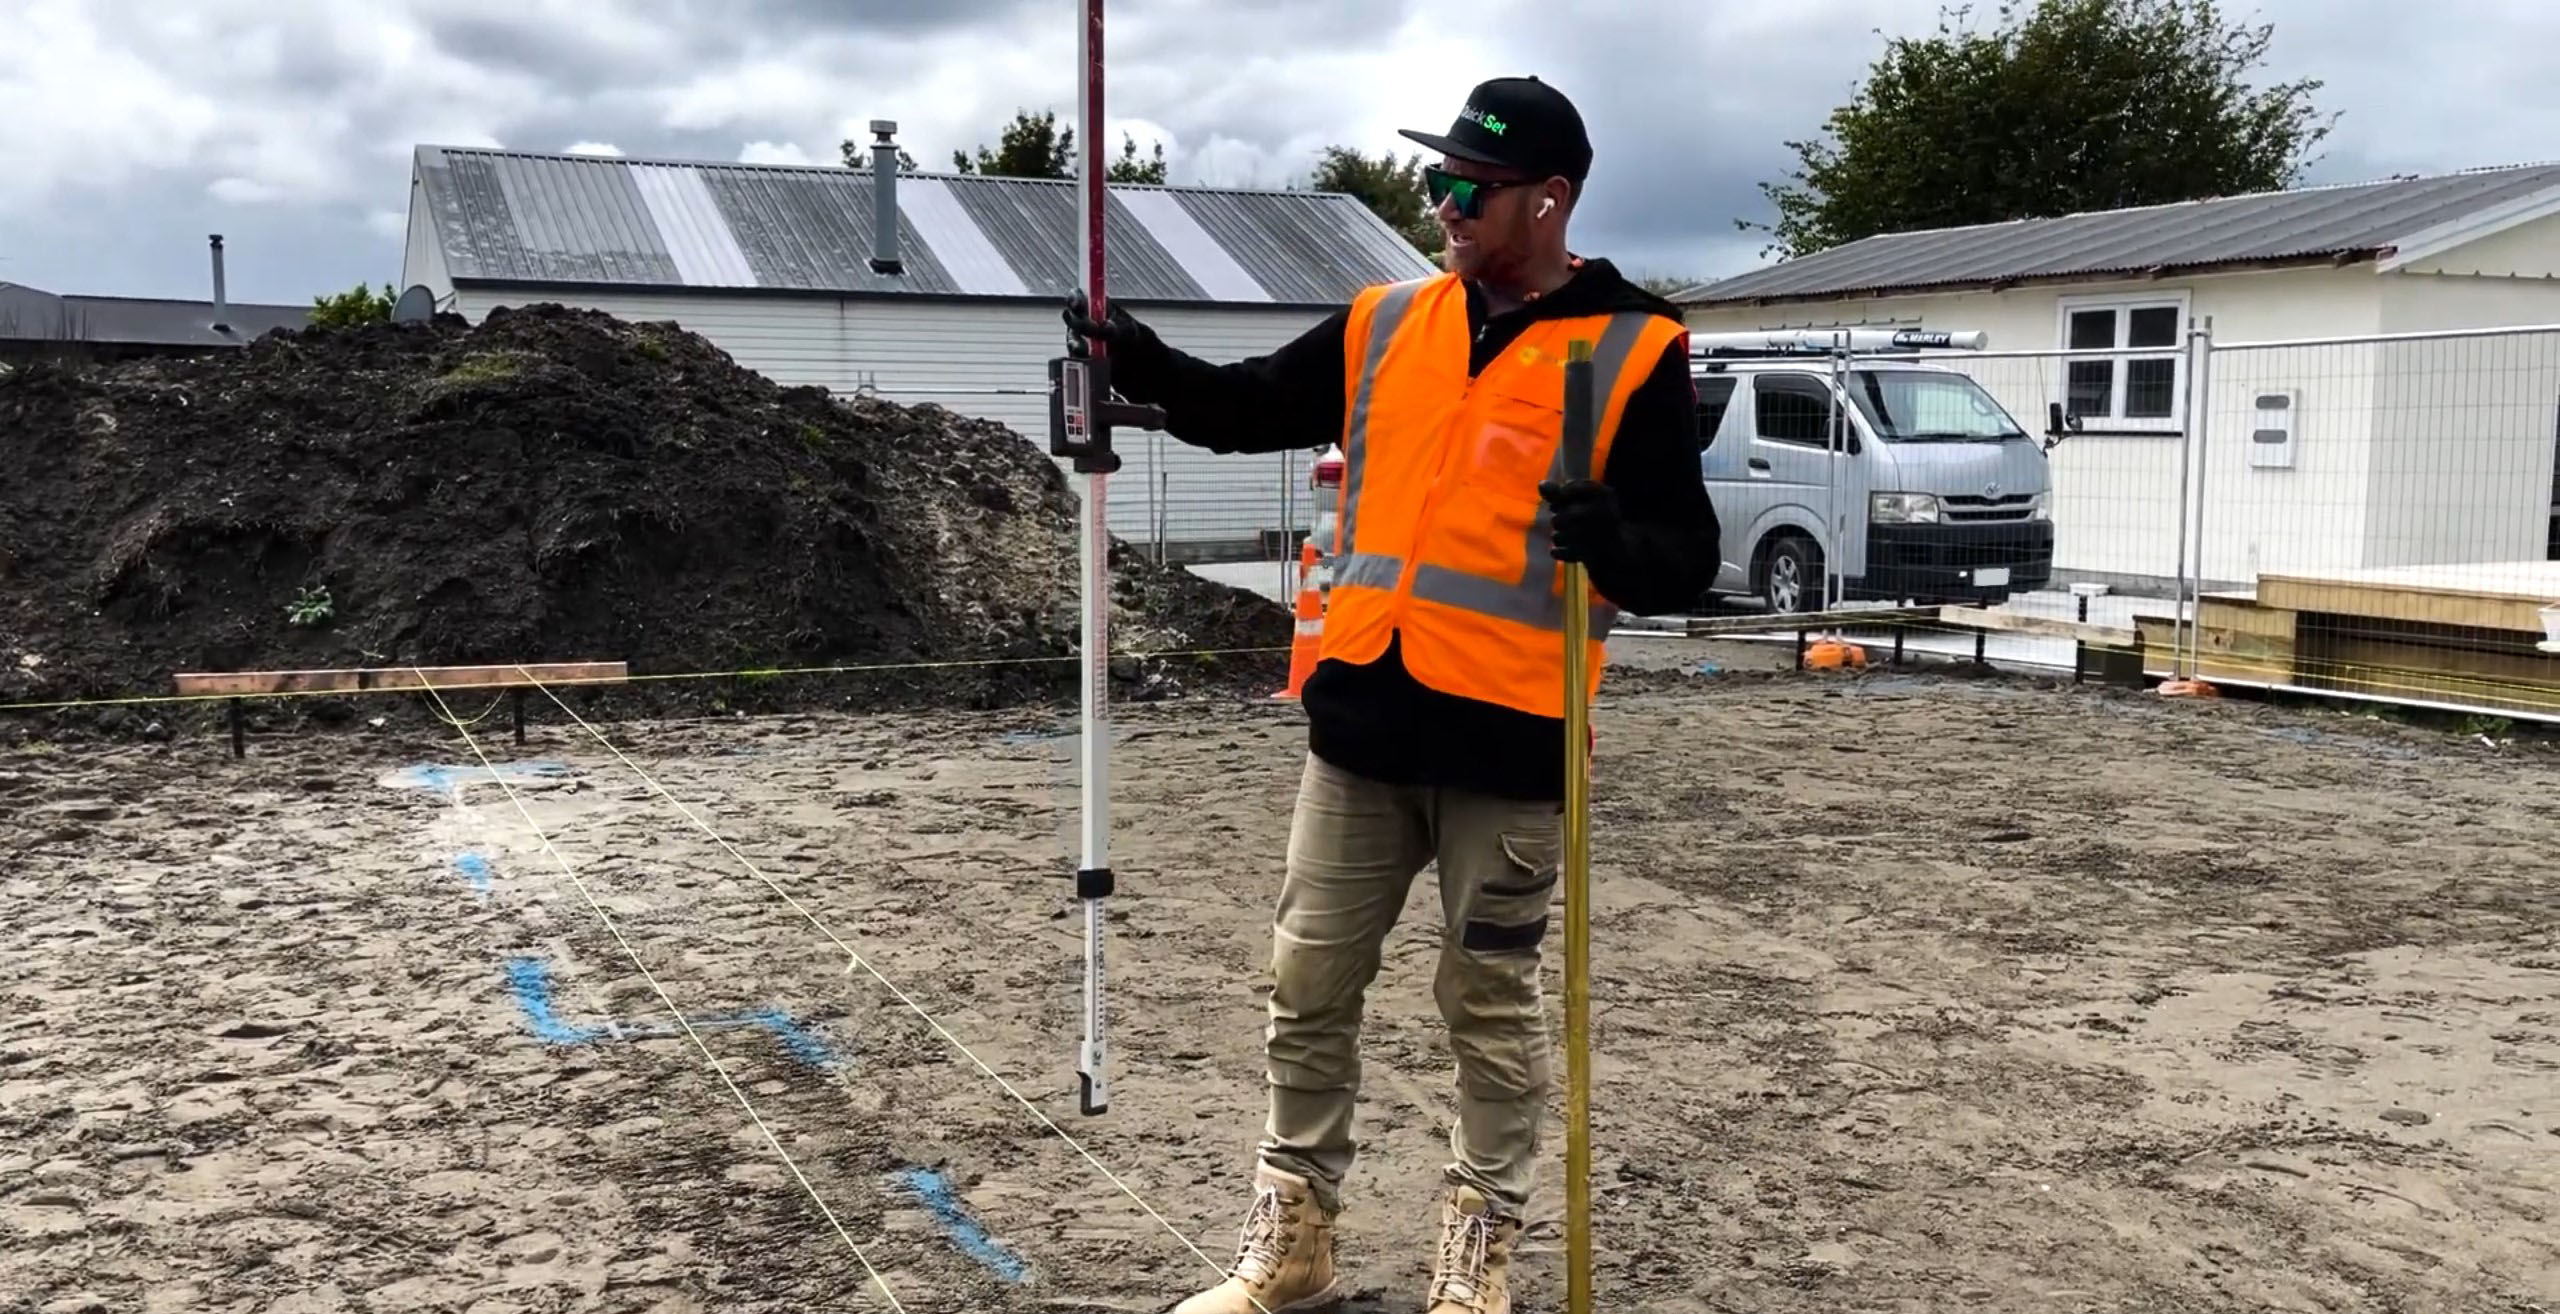
This section of the QuickSet system installation guide covers the steps of fixing the sand before laying the DPM (damp proof membrane) layer, and ensuring the sand height is within a ±5 mm tolerance.
The process involves preparing the surface for the DPM installation by sanding it to a smooth and even level, and measuring the sand height to ensure it falls within the specified tolerance range.
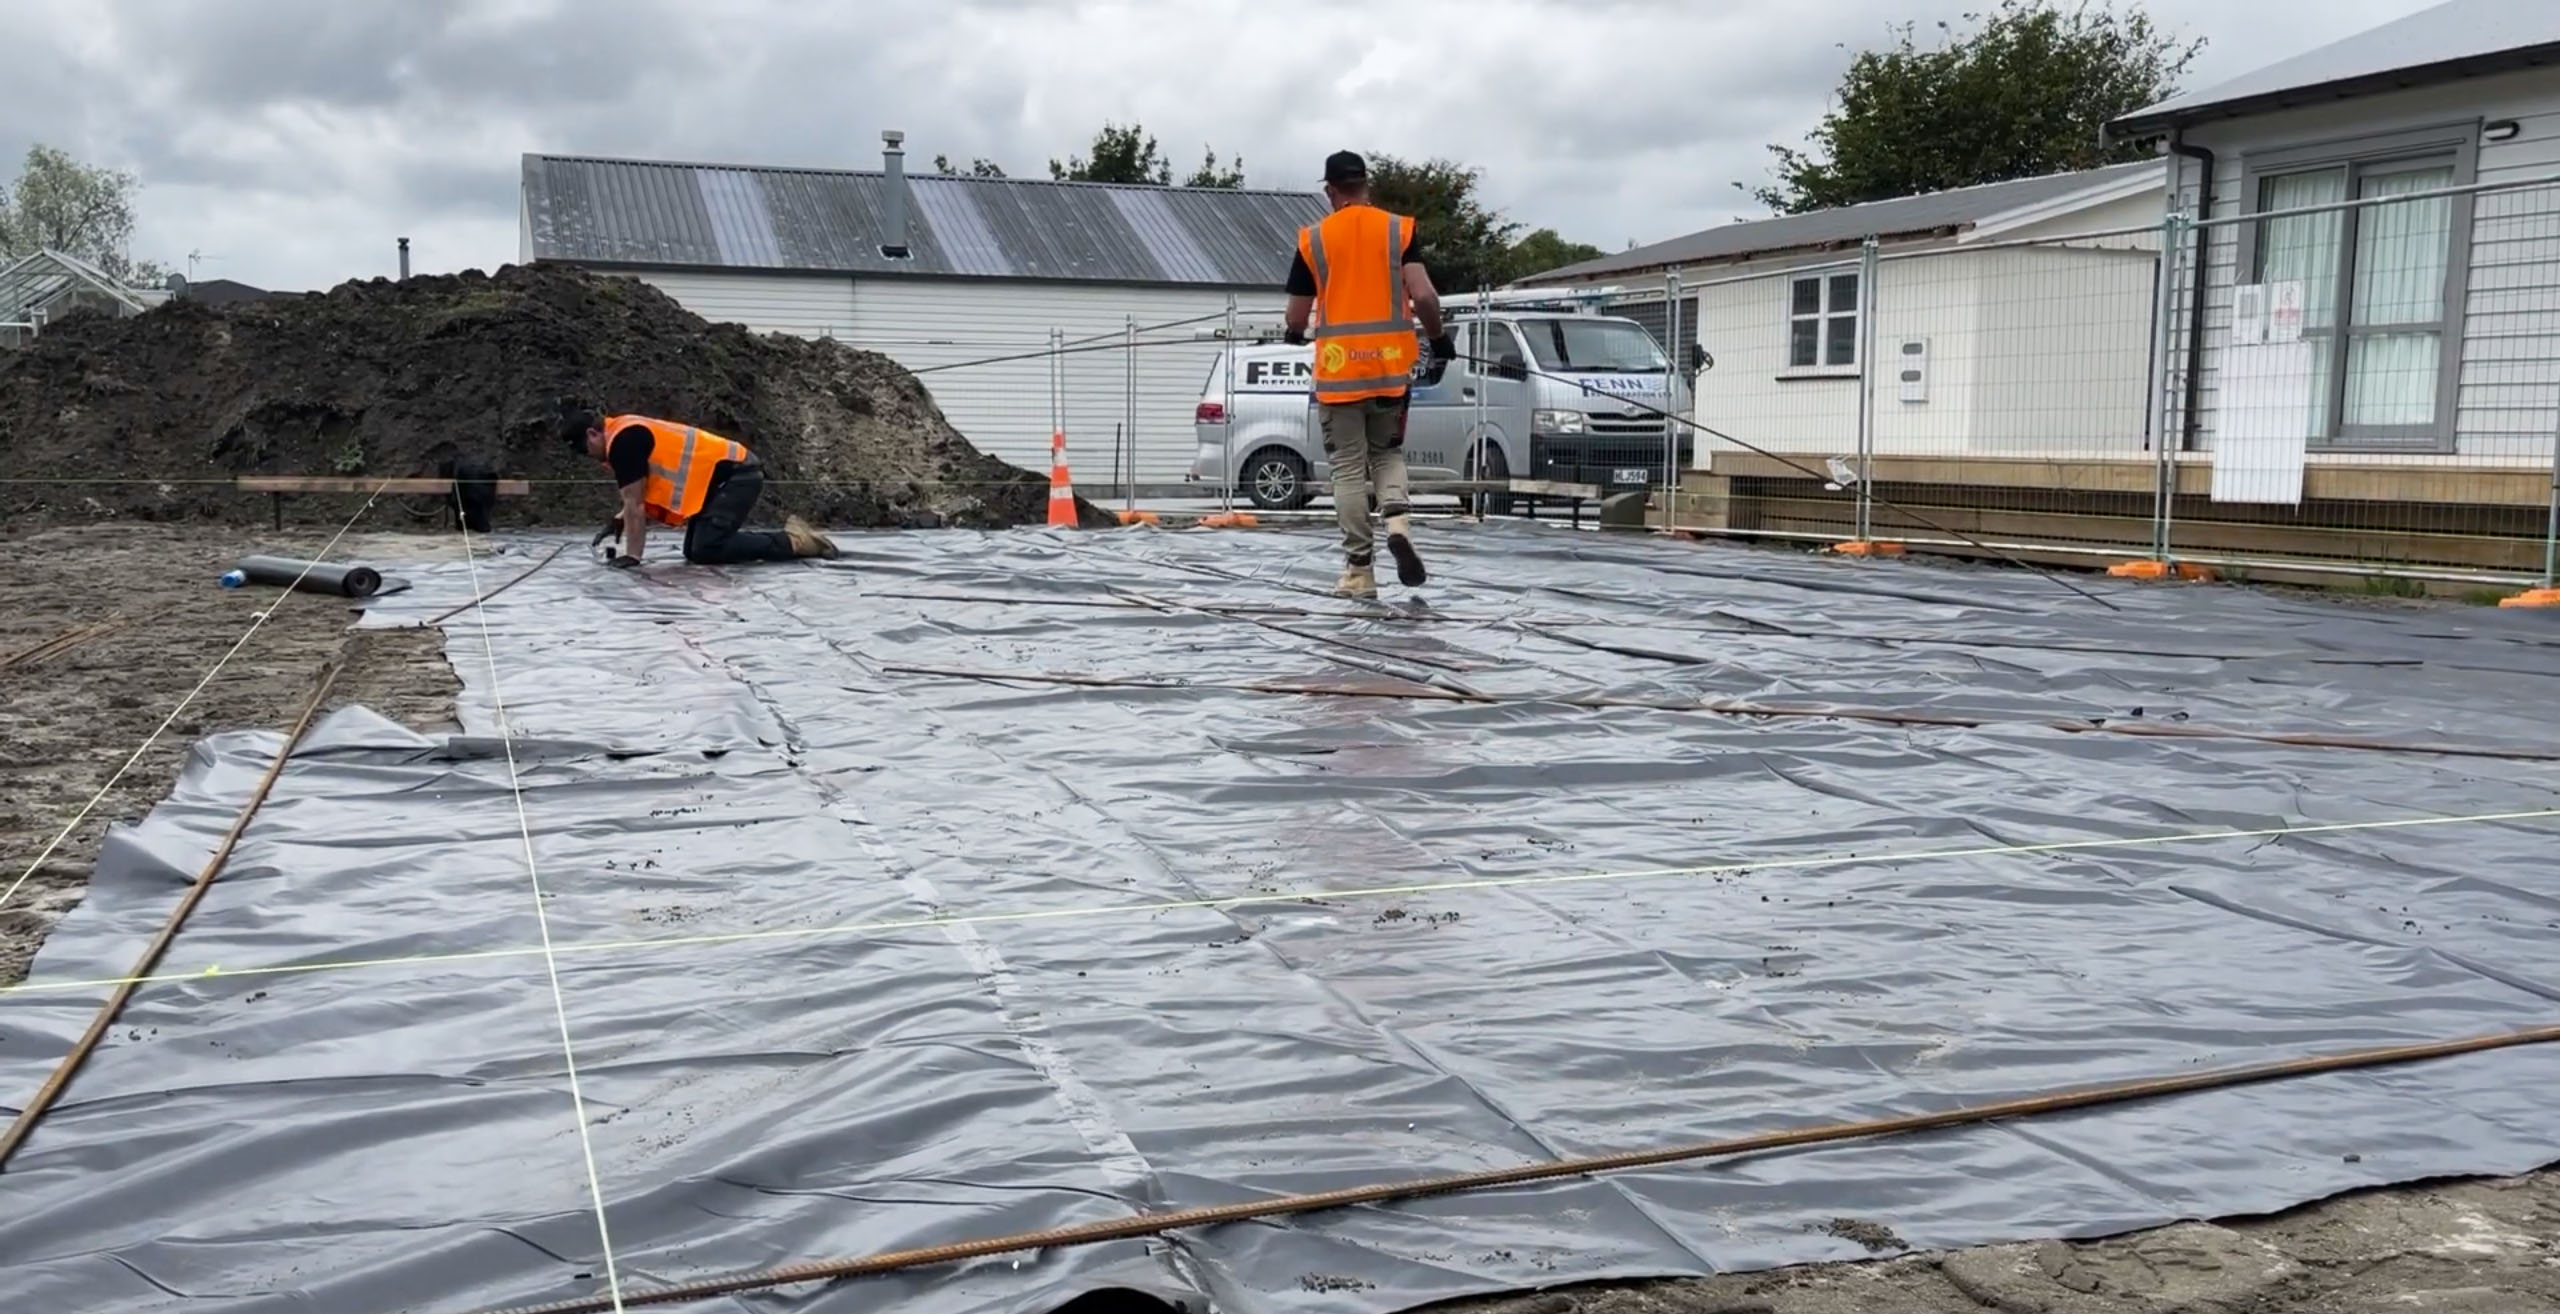
This section focuses on laying the DPM layer and securing it in place with the use of weights. The process involves spreading the DPM material evenly over the surface and ensuring that it is smooth and wrinkle-free. The reinforced steel is then placed on top of the DPM layer as a weight to hold it down and prevent it from shifting or slipping during the next steps of the installation process.
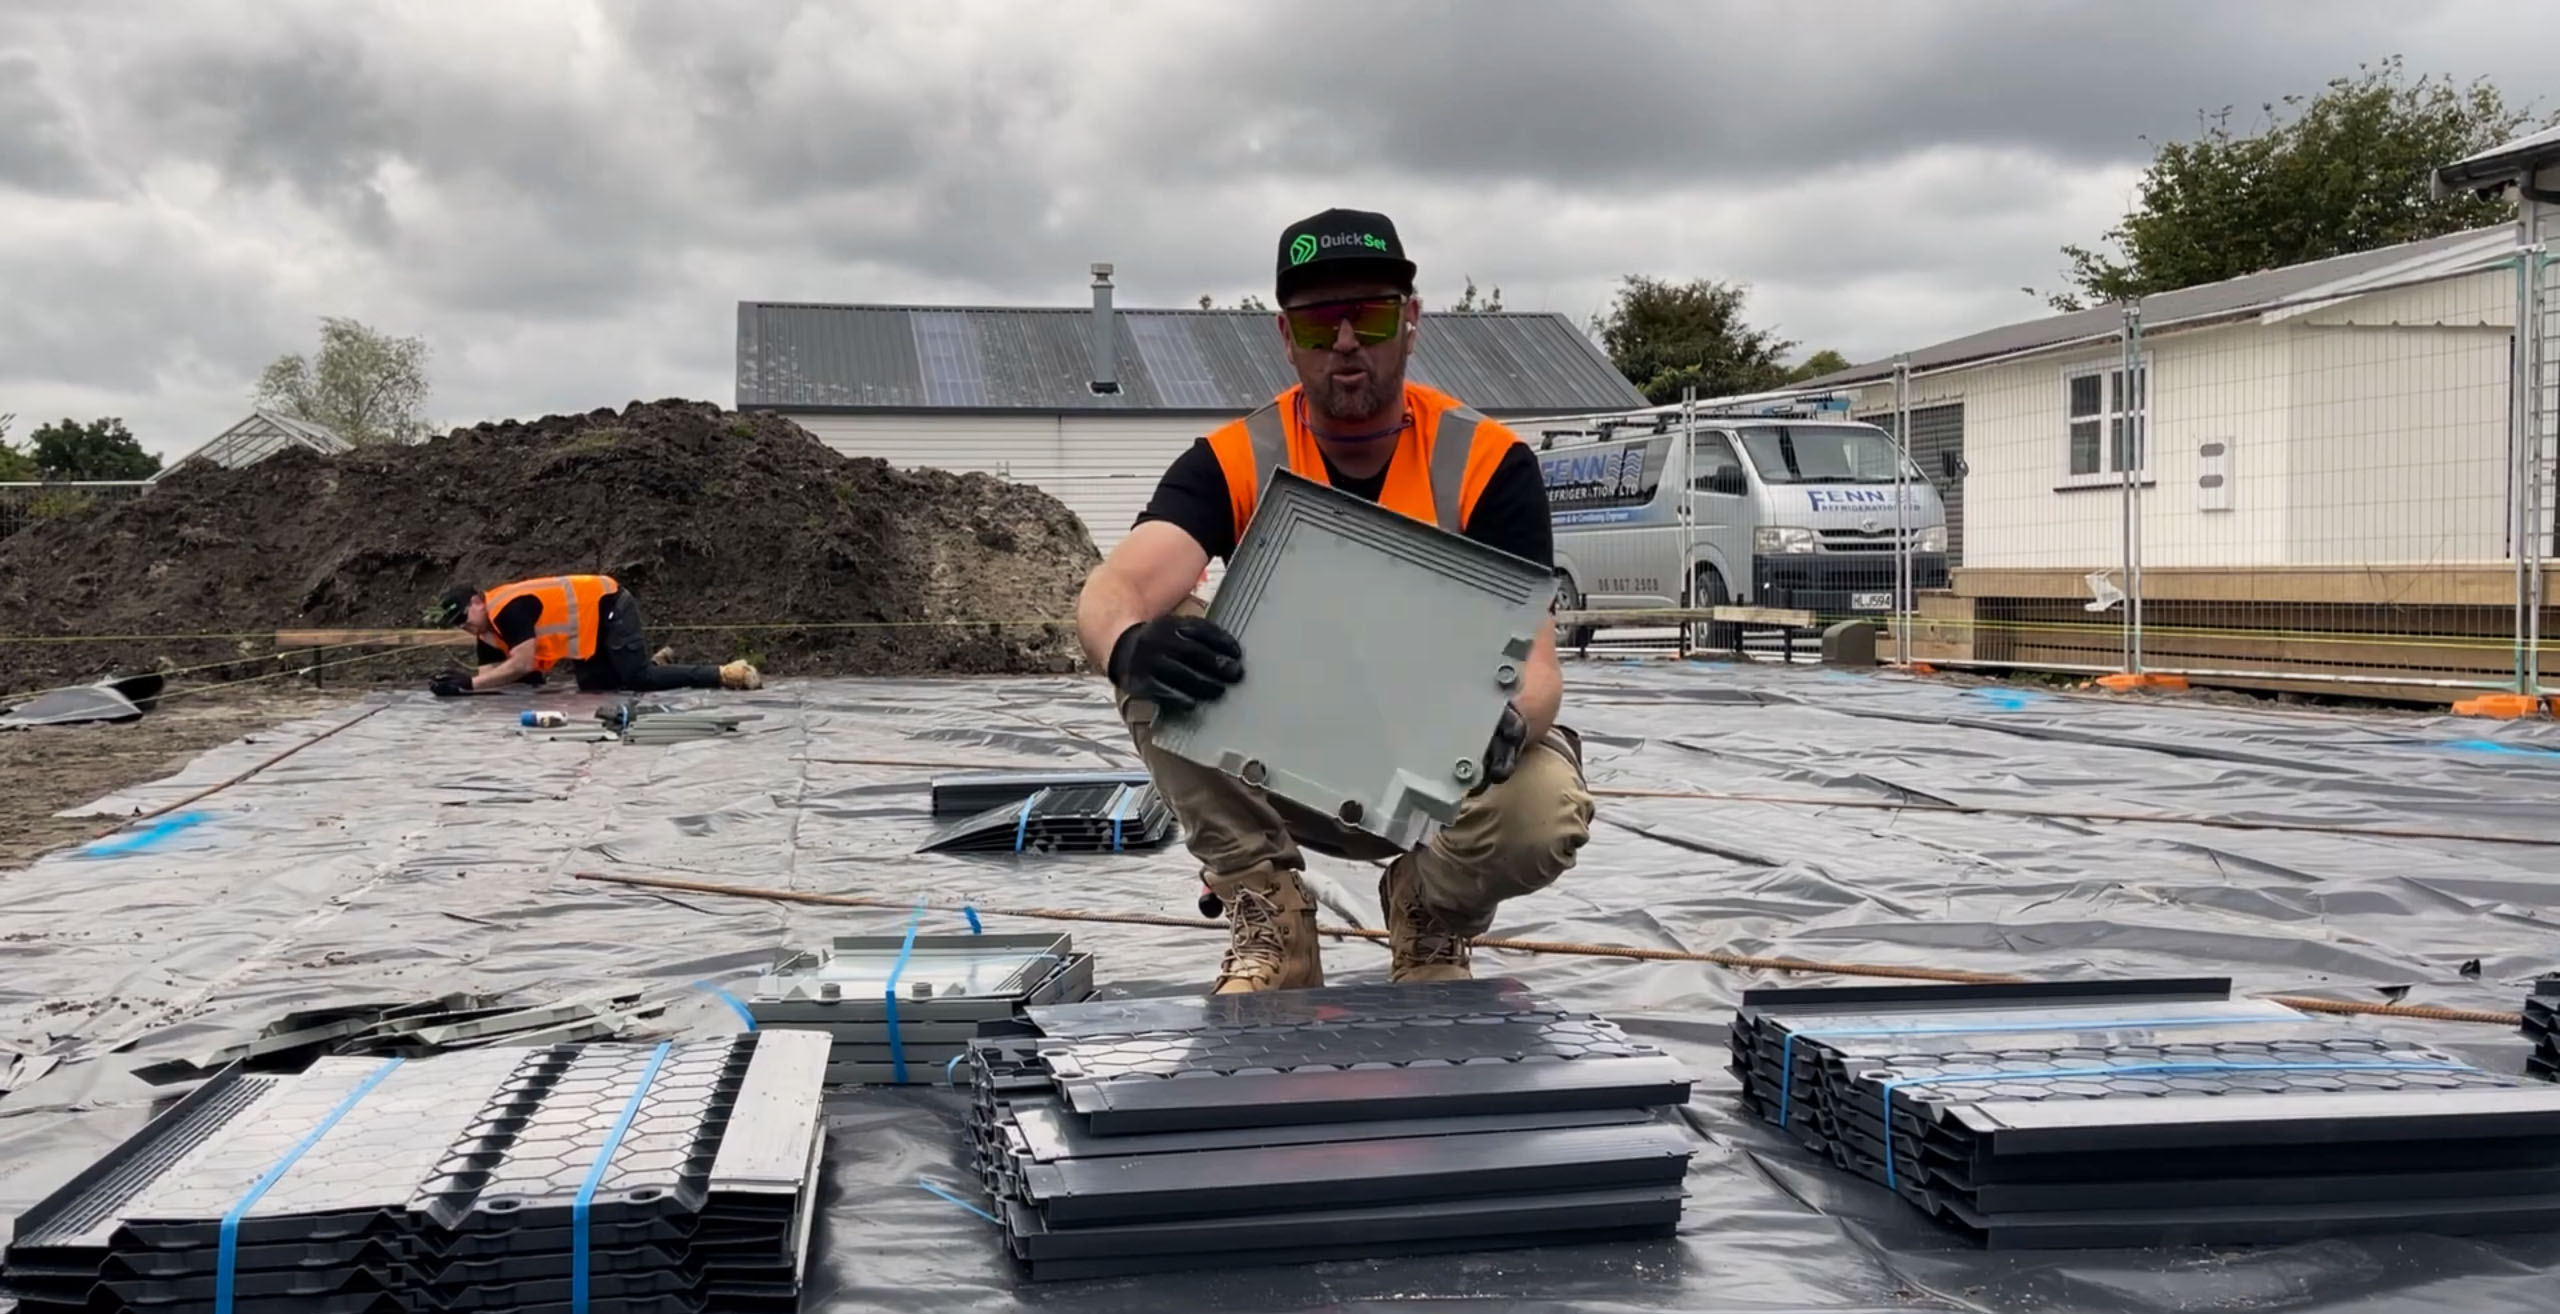
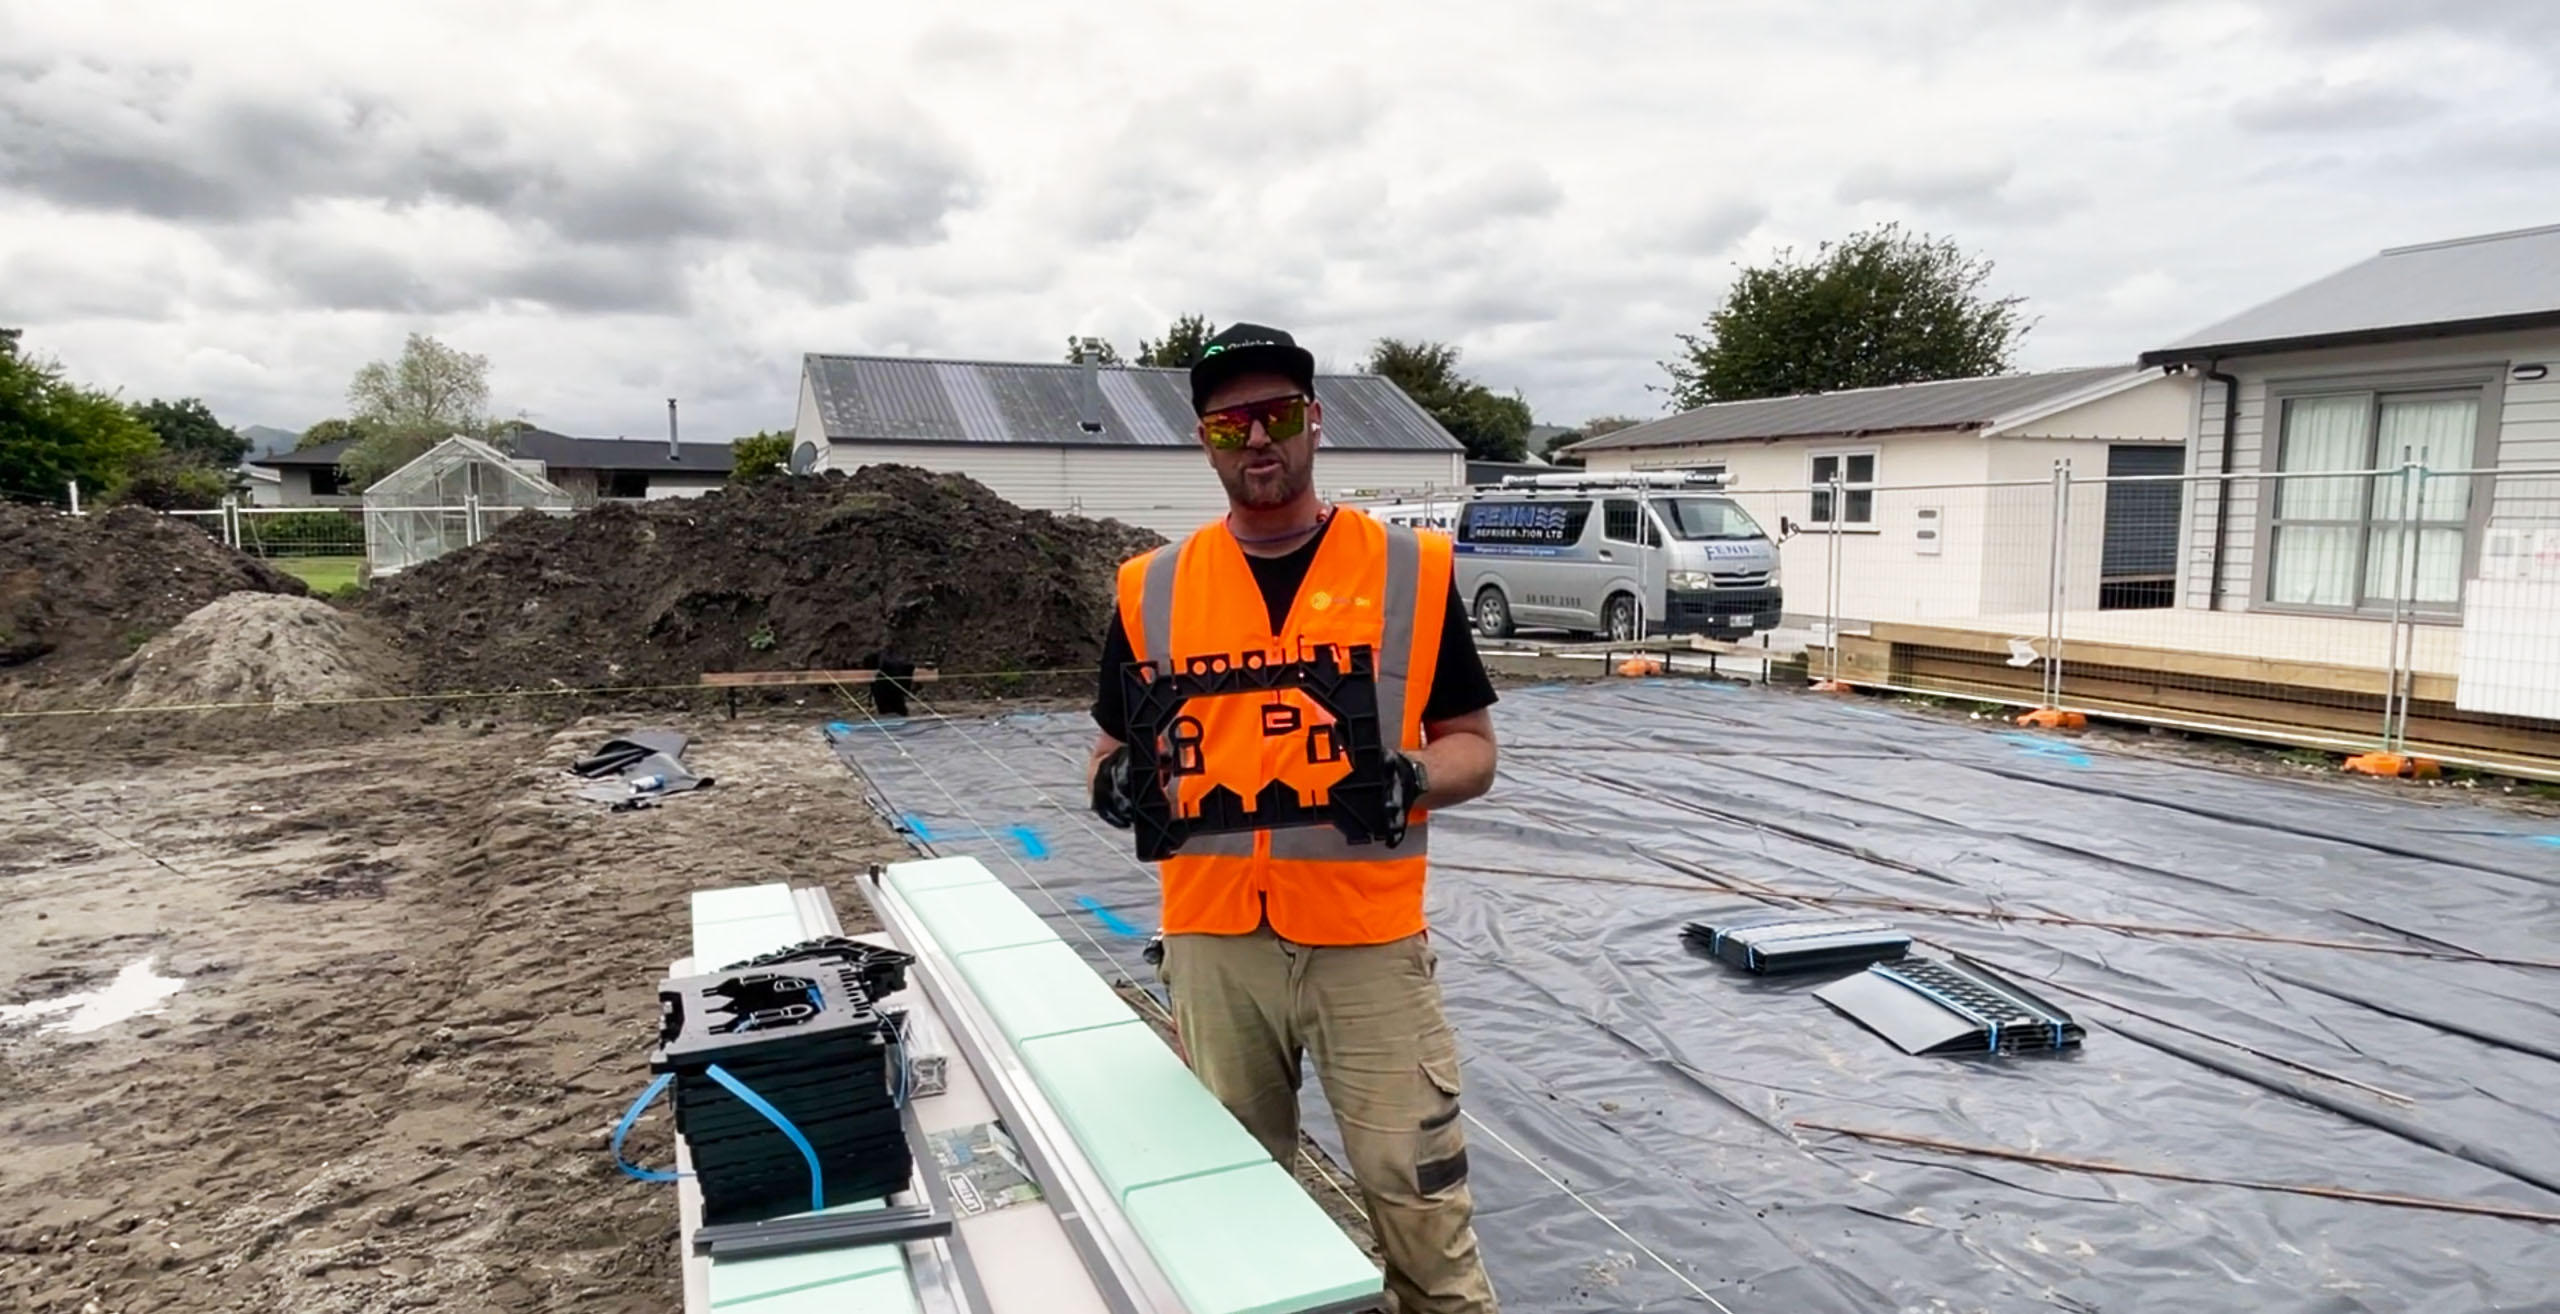
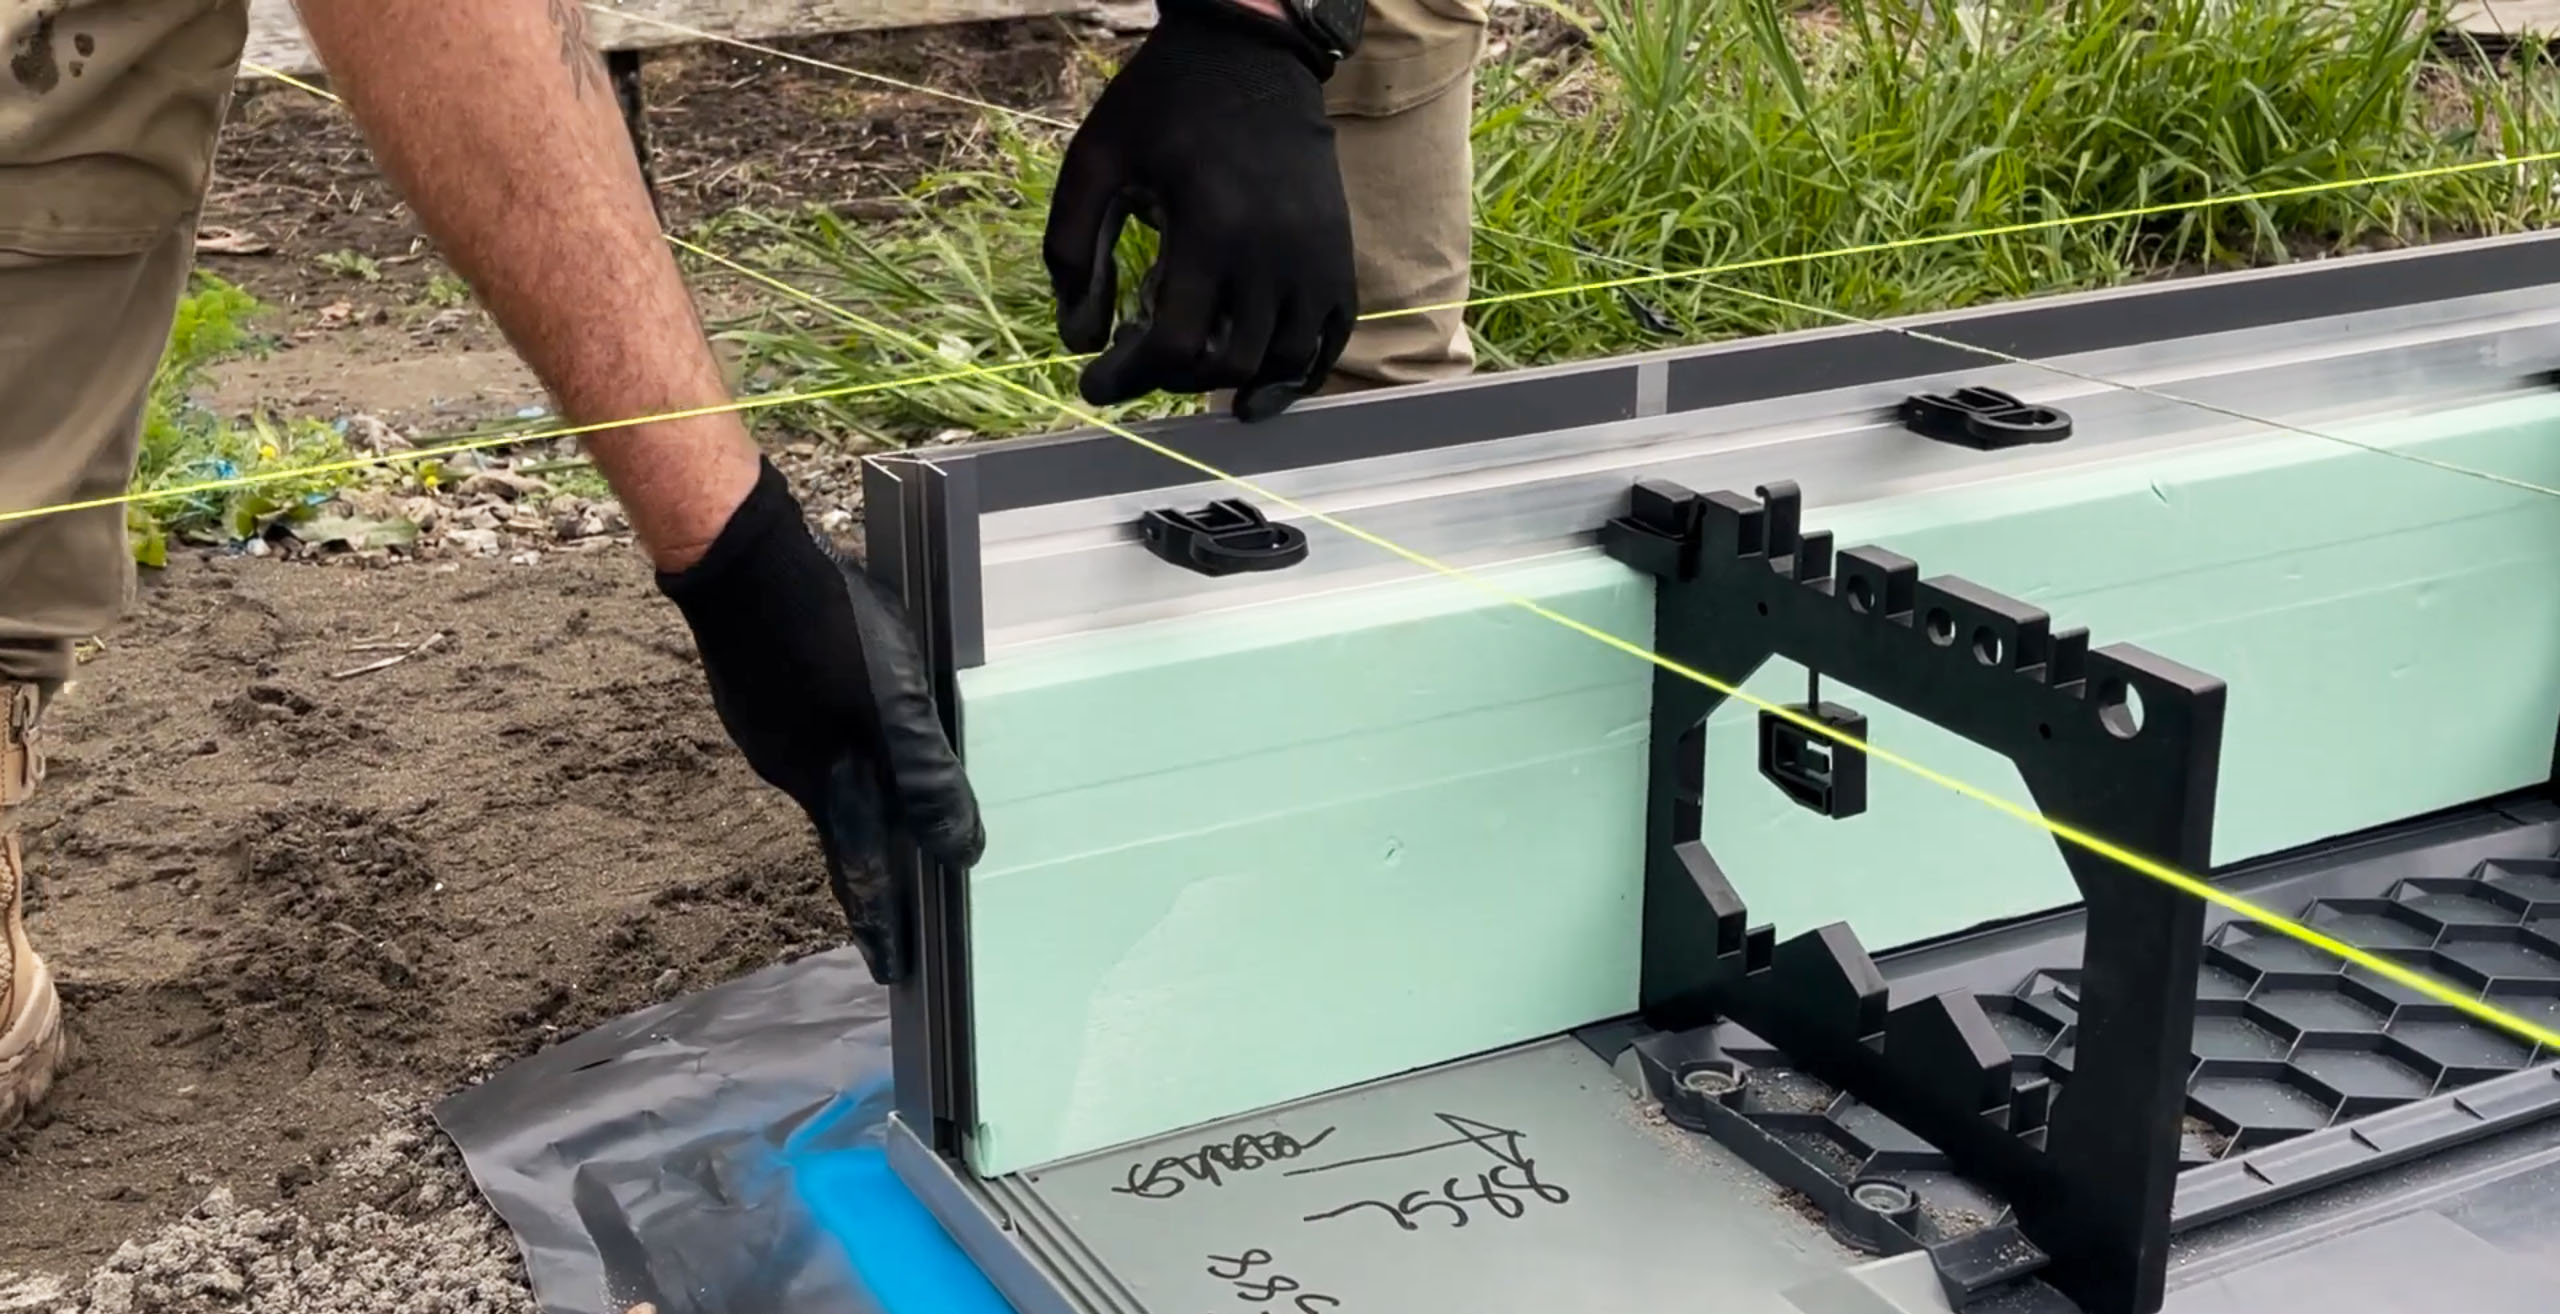
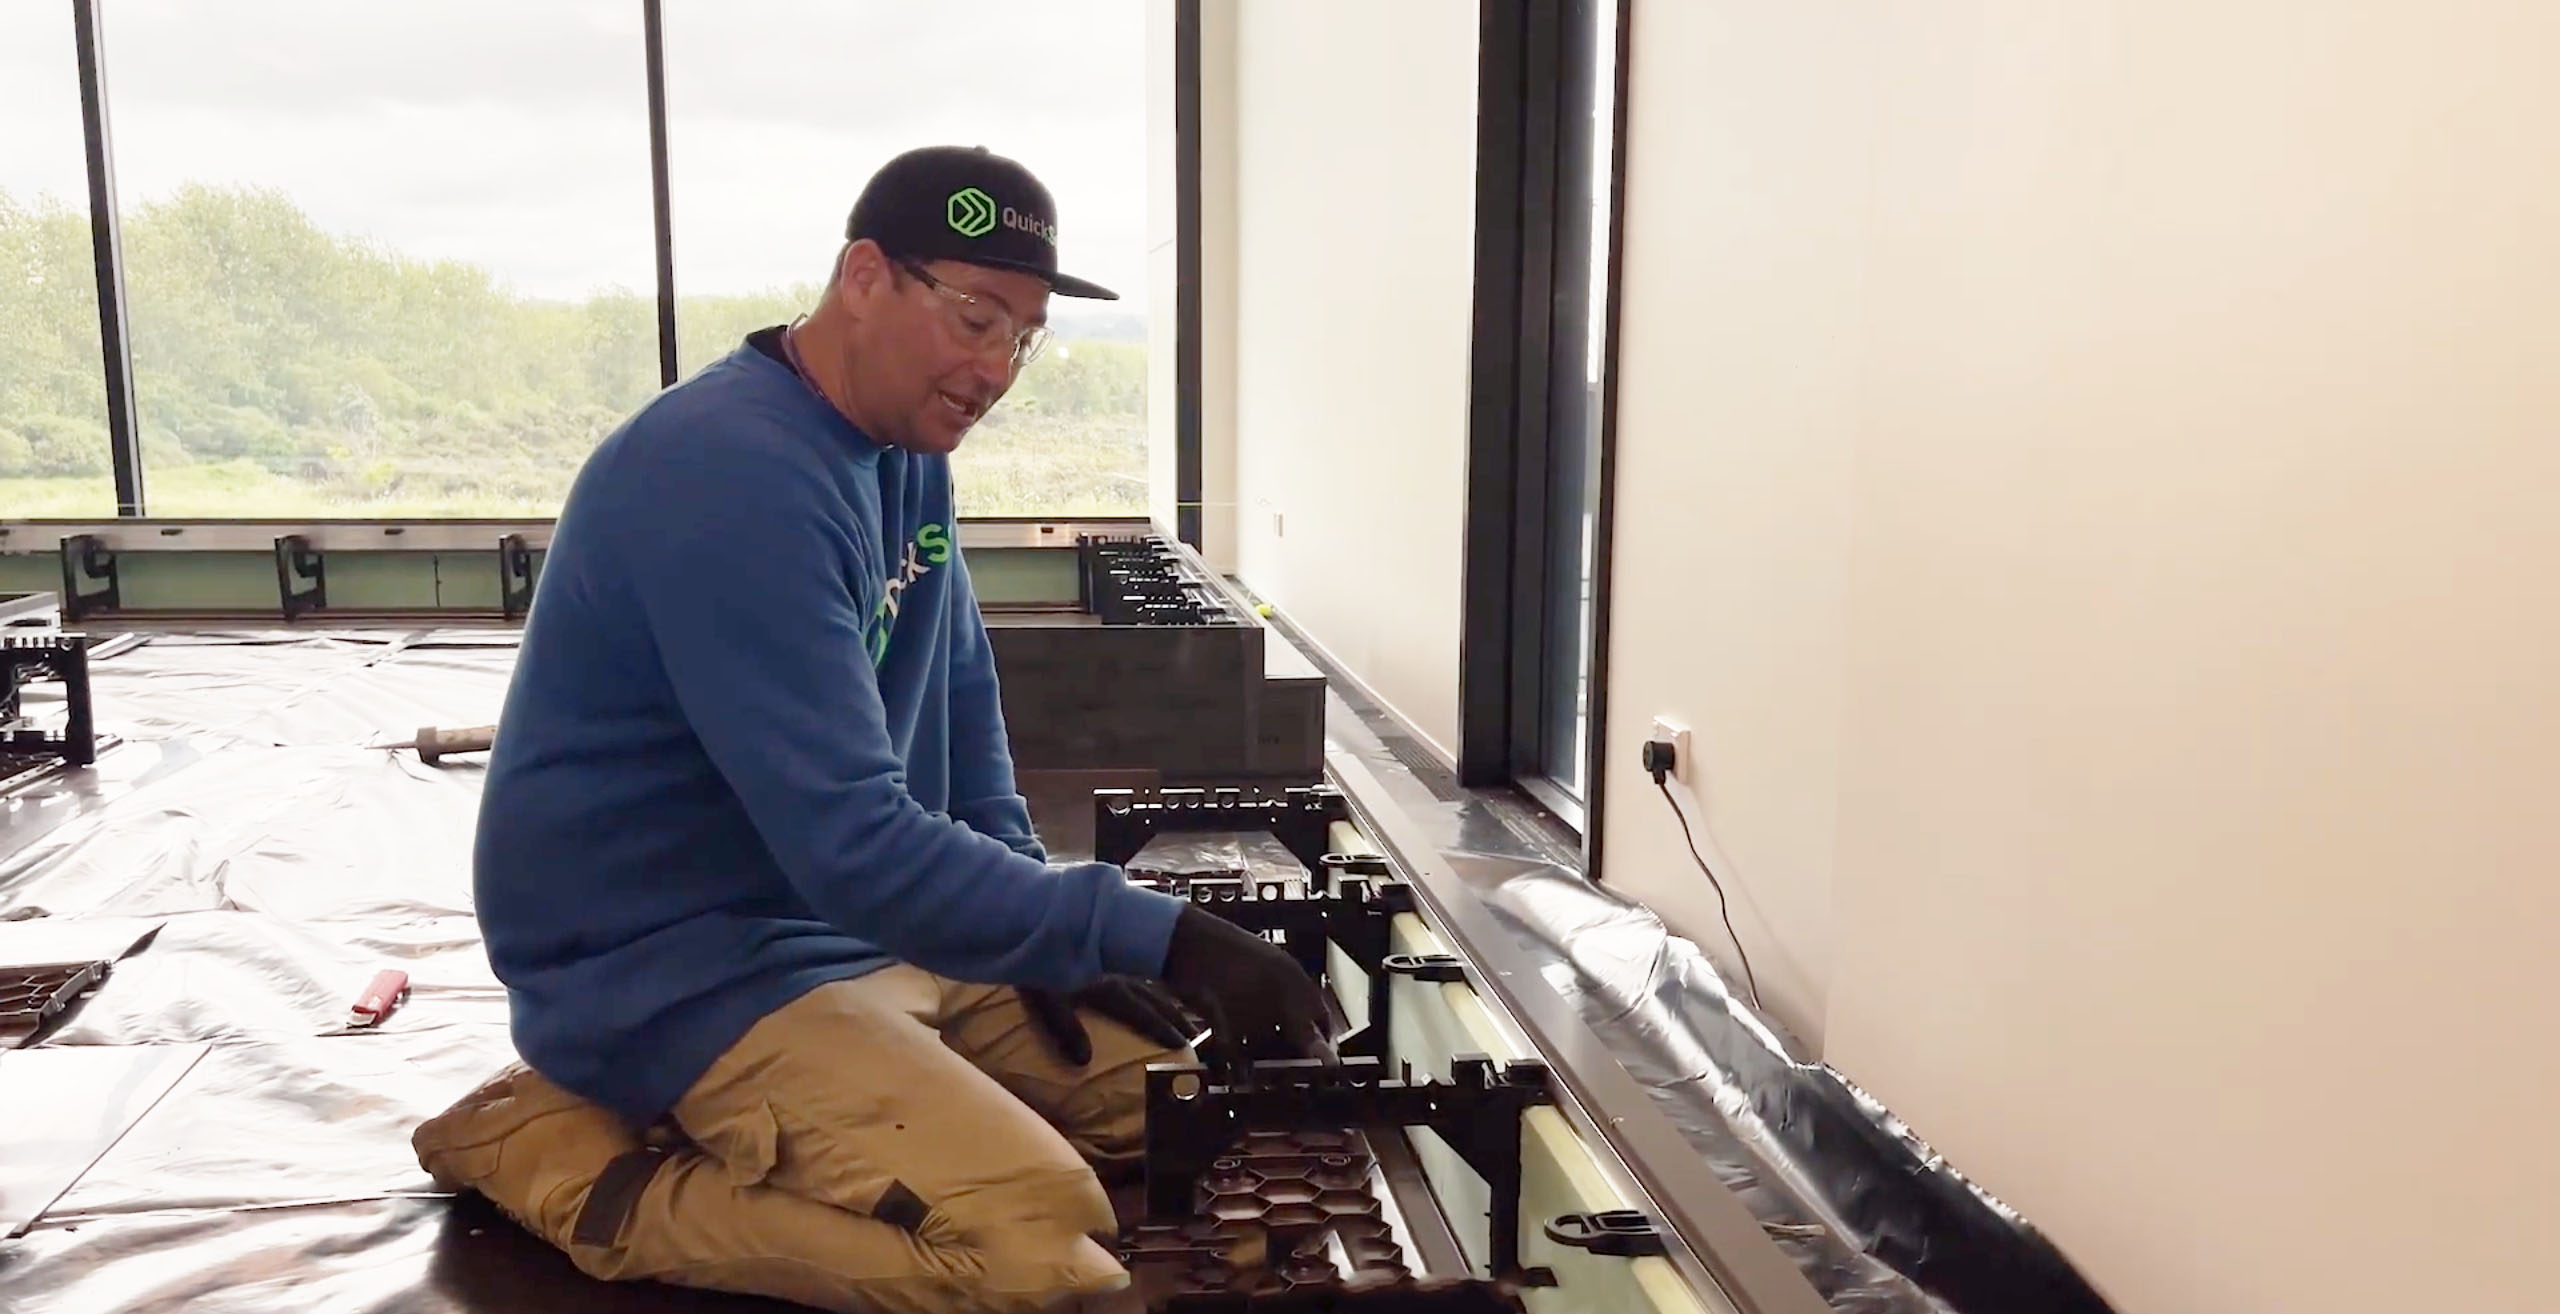
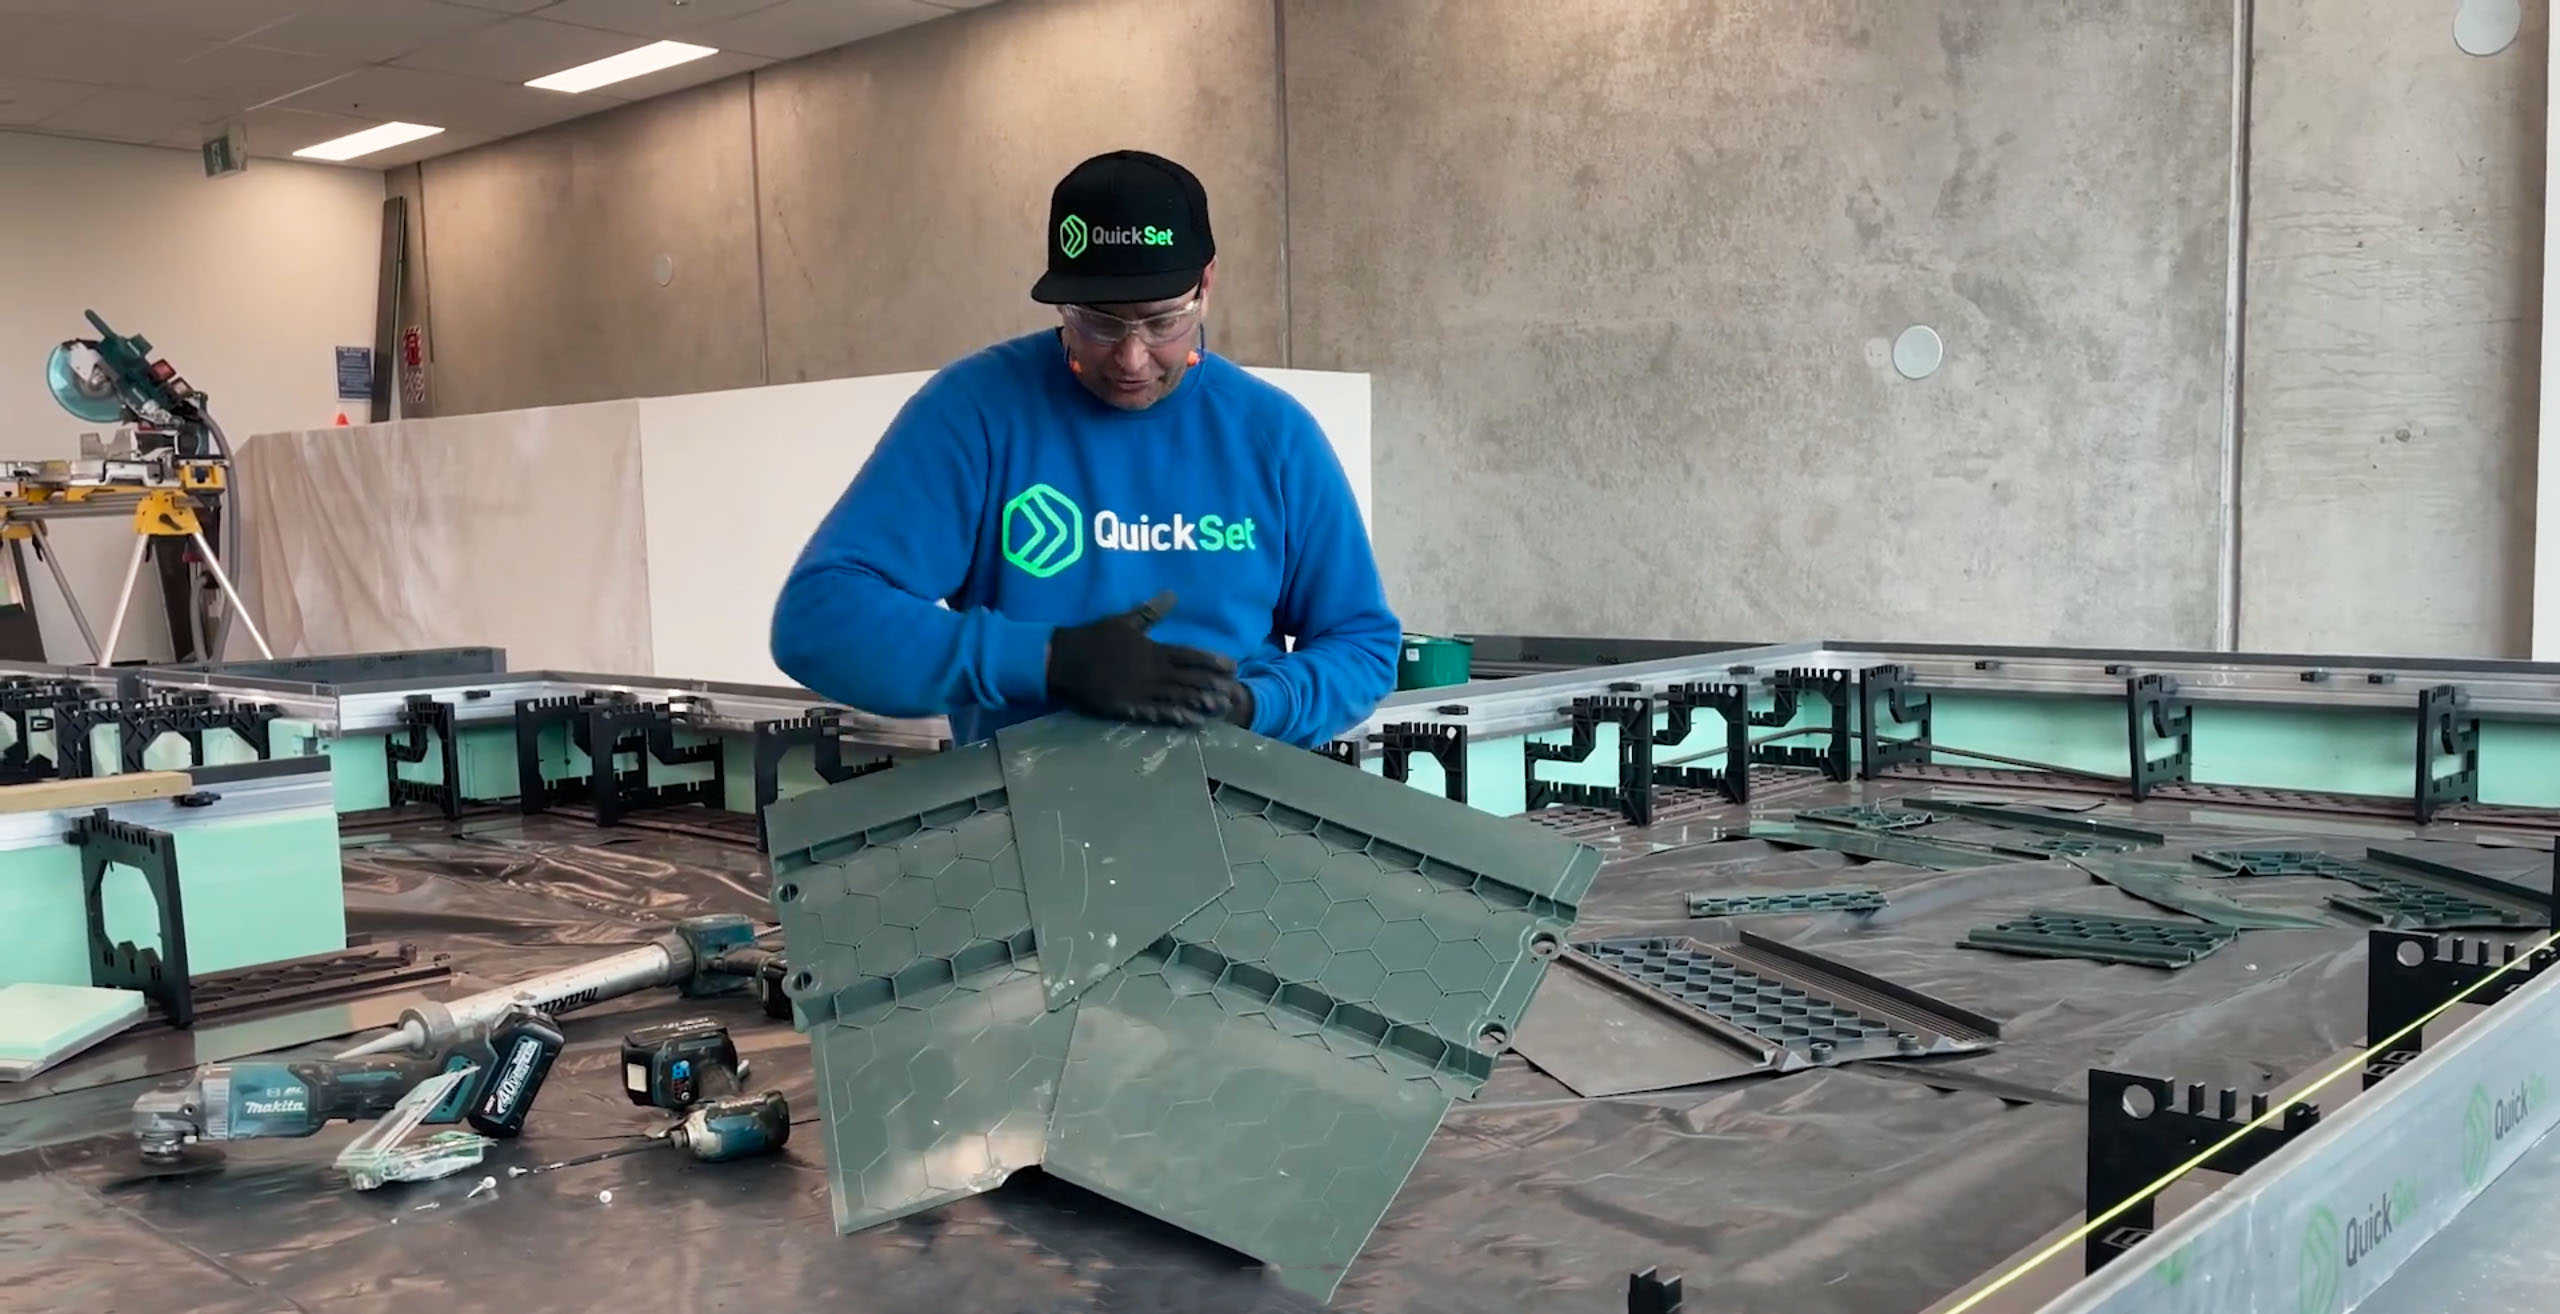
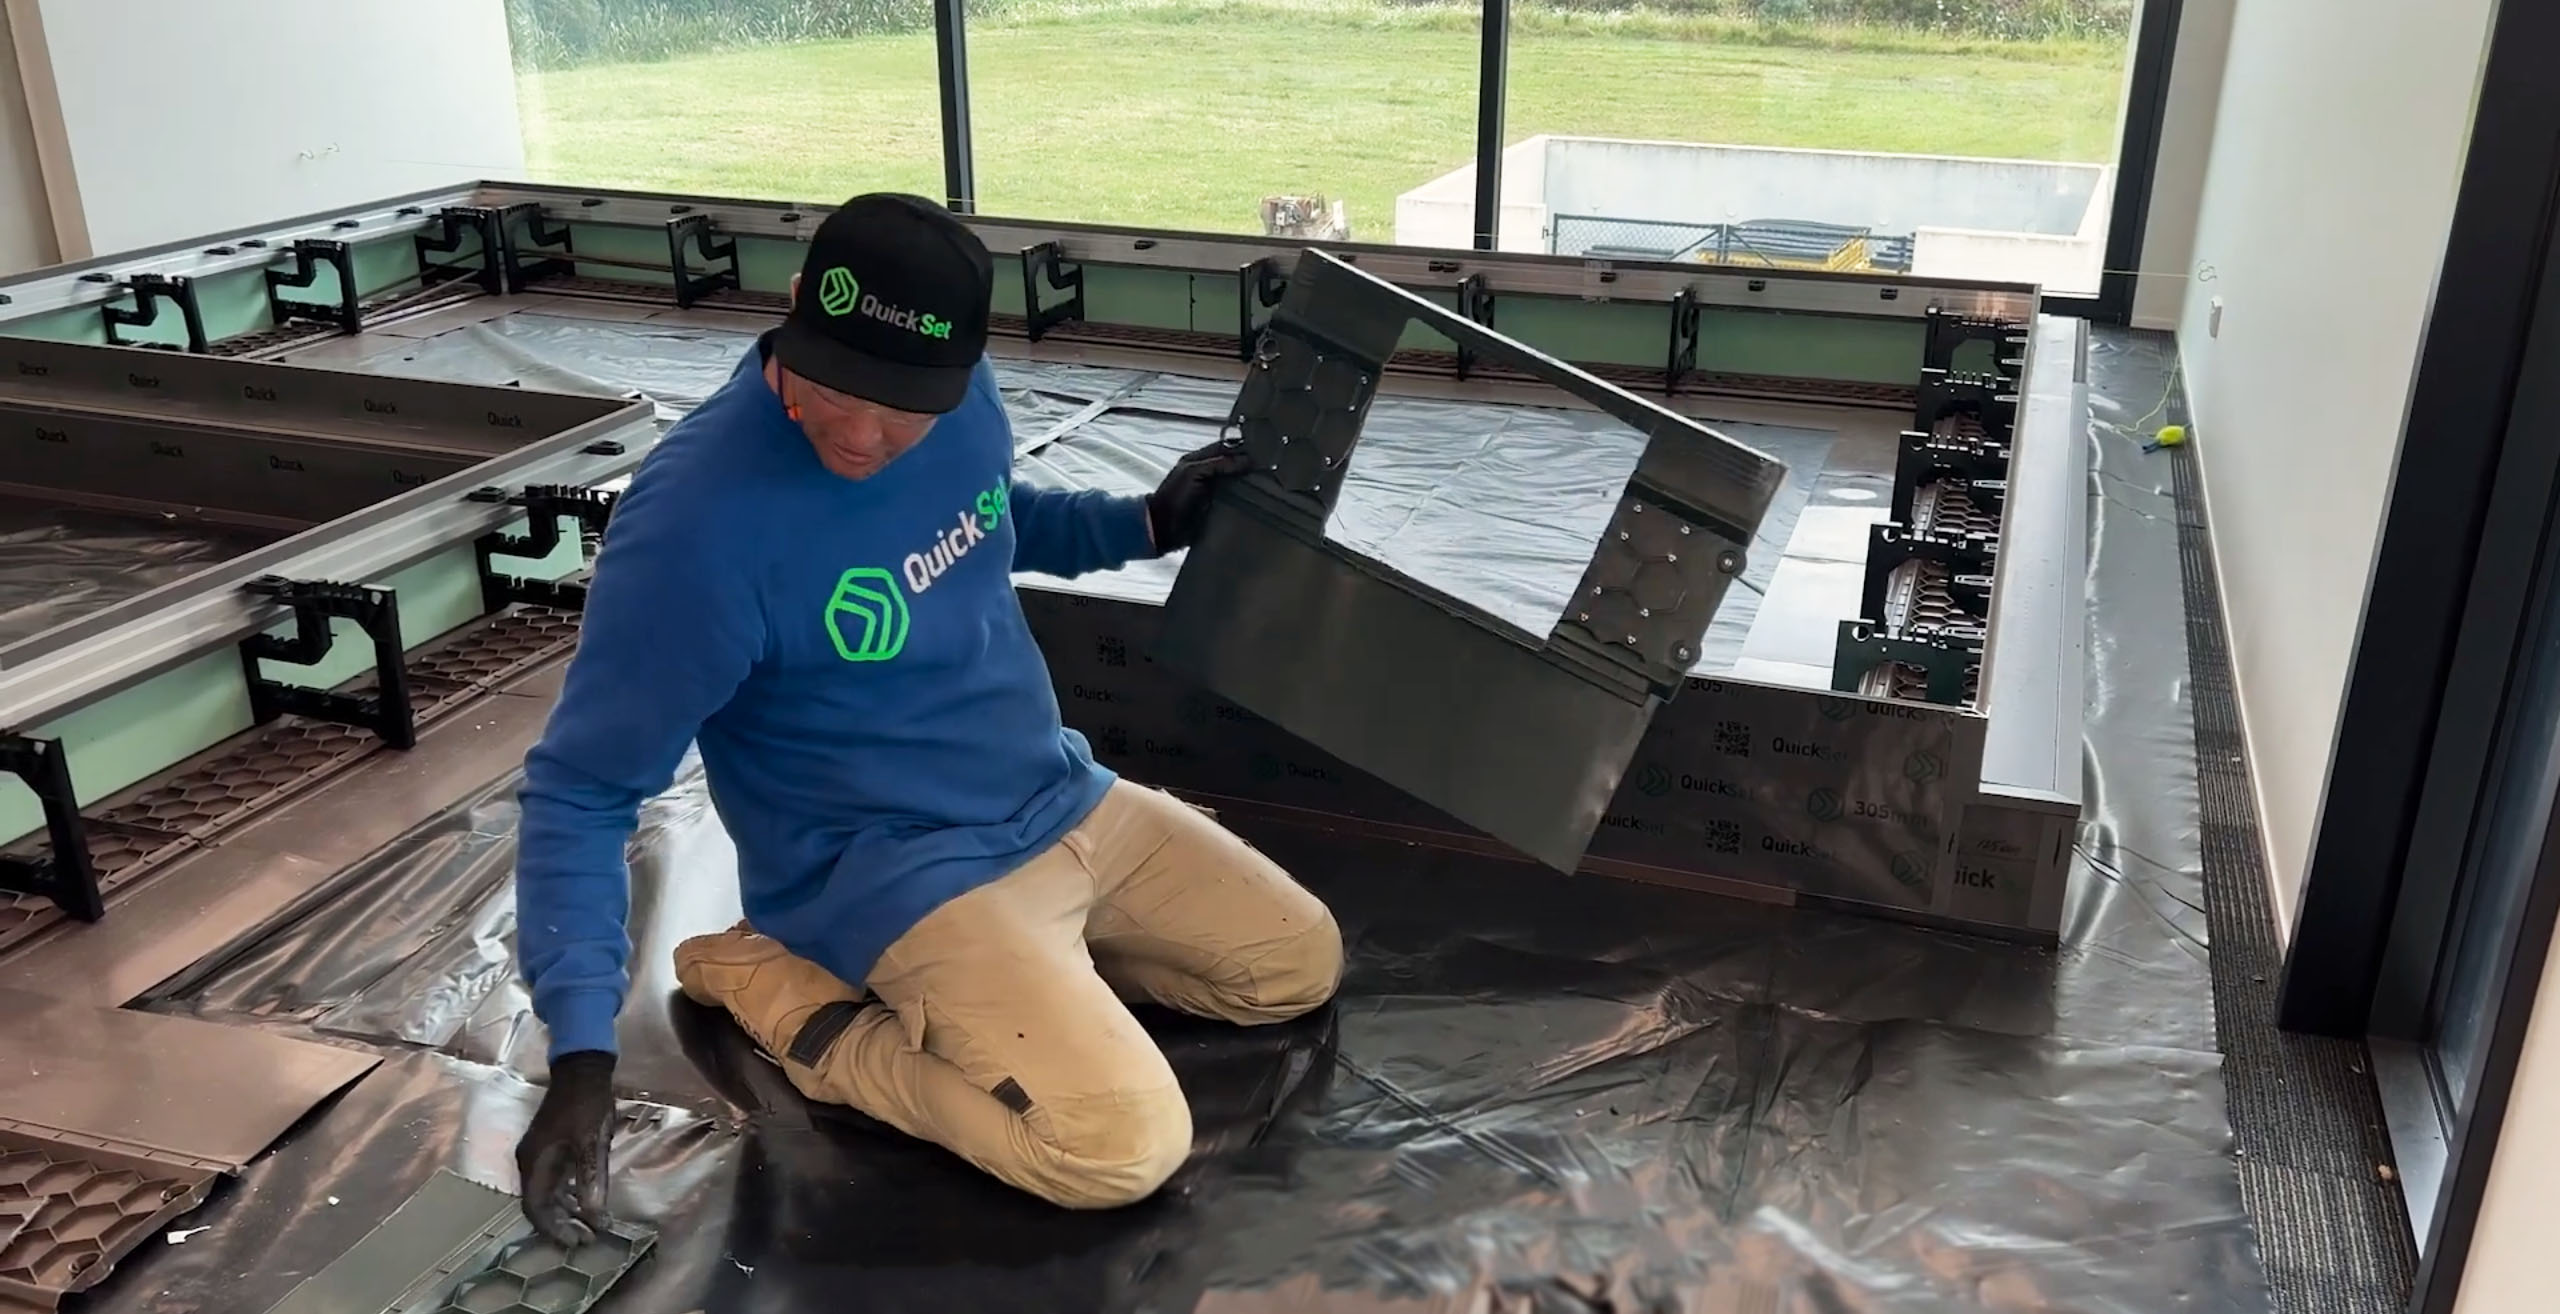
This section details the steps for putting together QuickSet’s bases. The videos include tips on measuring walls, efficiently connecting components, and assembling the system’s modular components alongside one another.
Section 4 of the QuickSet system installation guide covers the installation of the QuickSet stirrups, which are used to secure the system’s components in place. The process involves using four stirrups per board, each containing widgets.
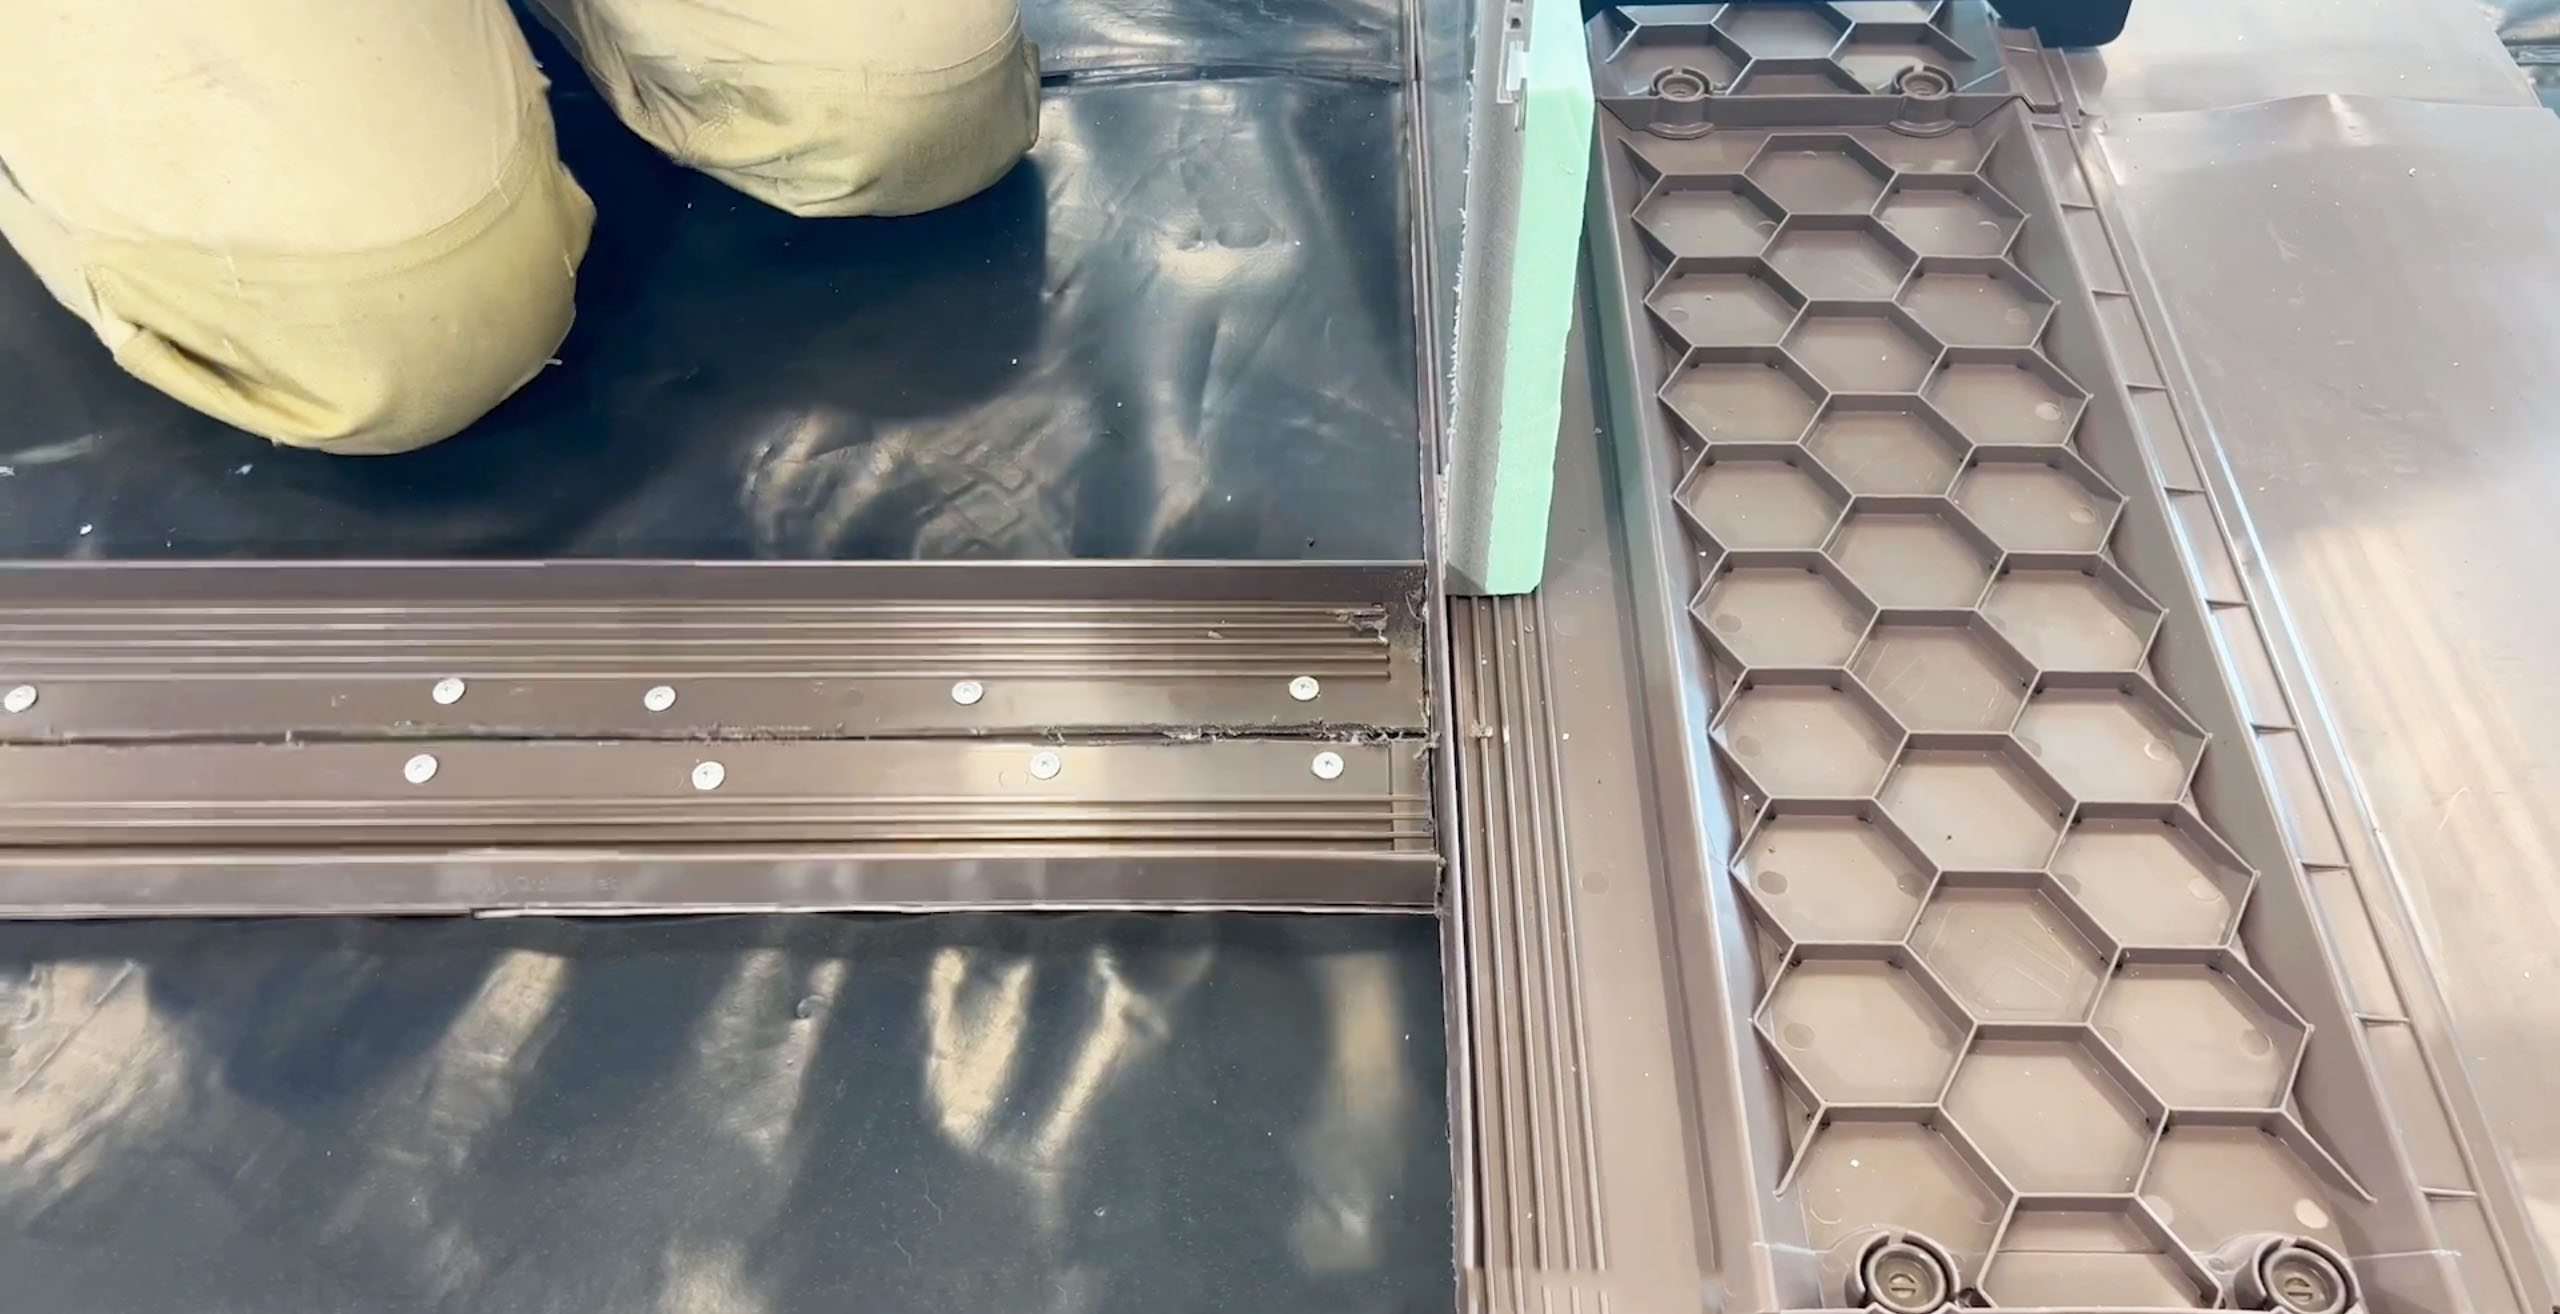
The section provides step-by-step instructions on how to properly use the corners and joiners, as well as how to apply adhesive to ensure a secure connection.
This section is an essential part of the QuickSet system installation process, as it ensures that the form and base are properly connected and can withstand the weight of the concrete during the pouring process.
If your project features brick rebates, we recommend that you learn more about using them with QuickSet alongside this section.
Additional information concerning the QuickSet Ultra Top Cap and the use of QuickSet Packers can also be found near the end of this section.
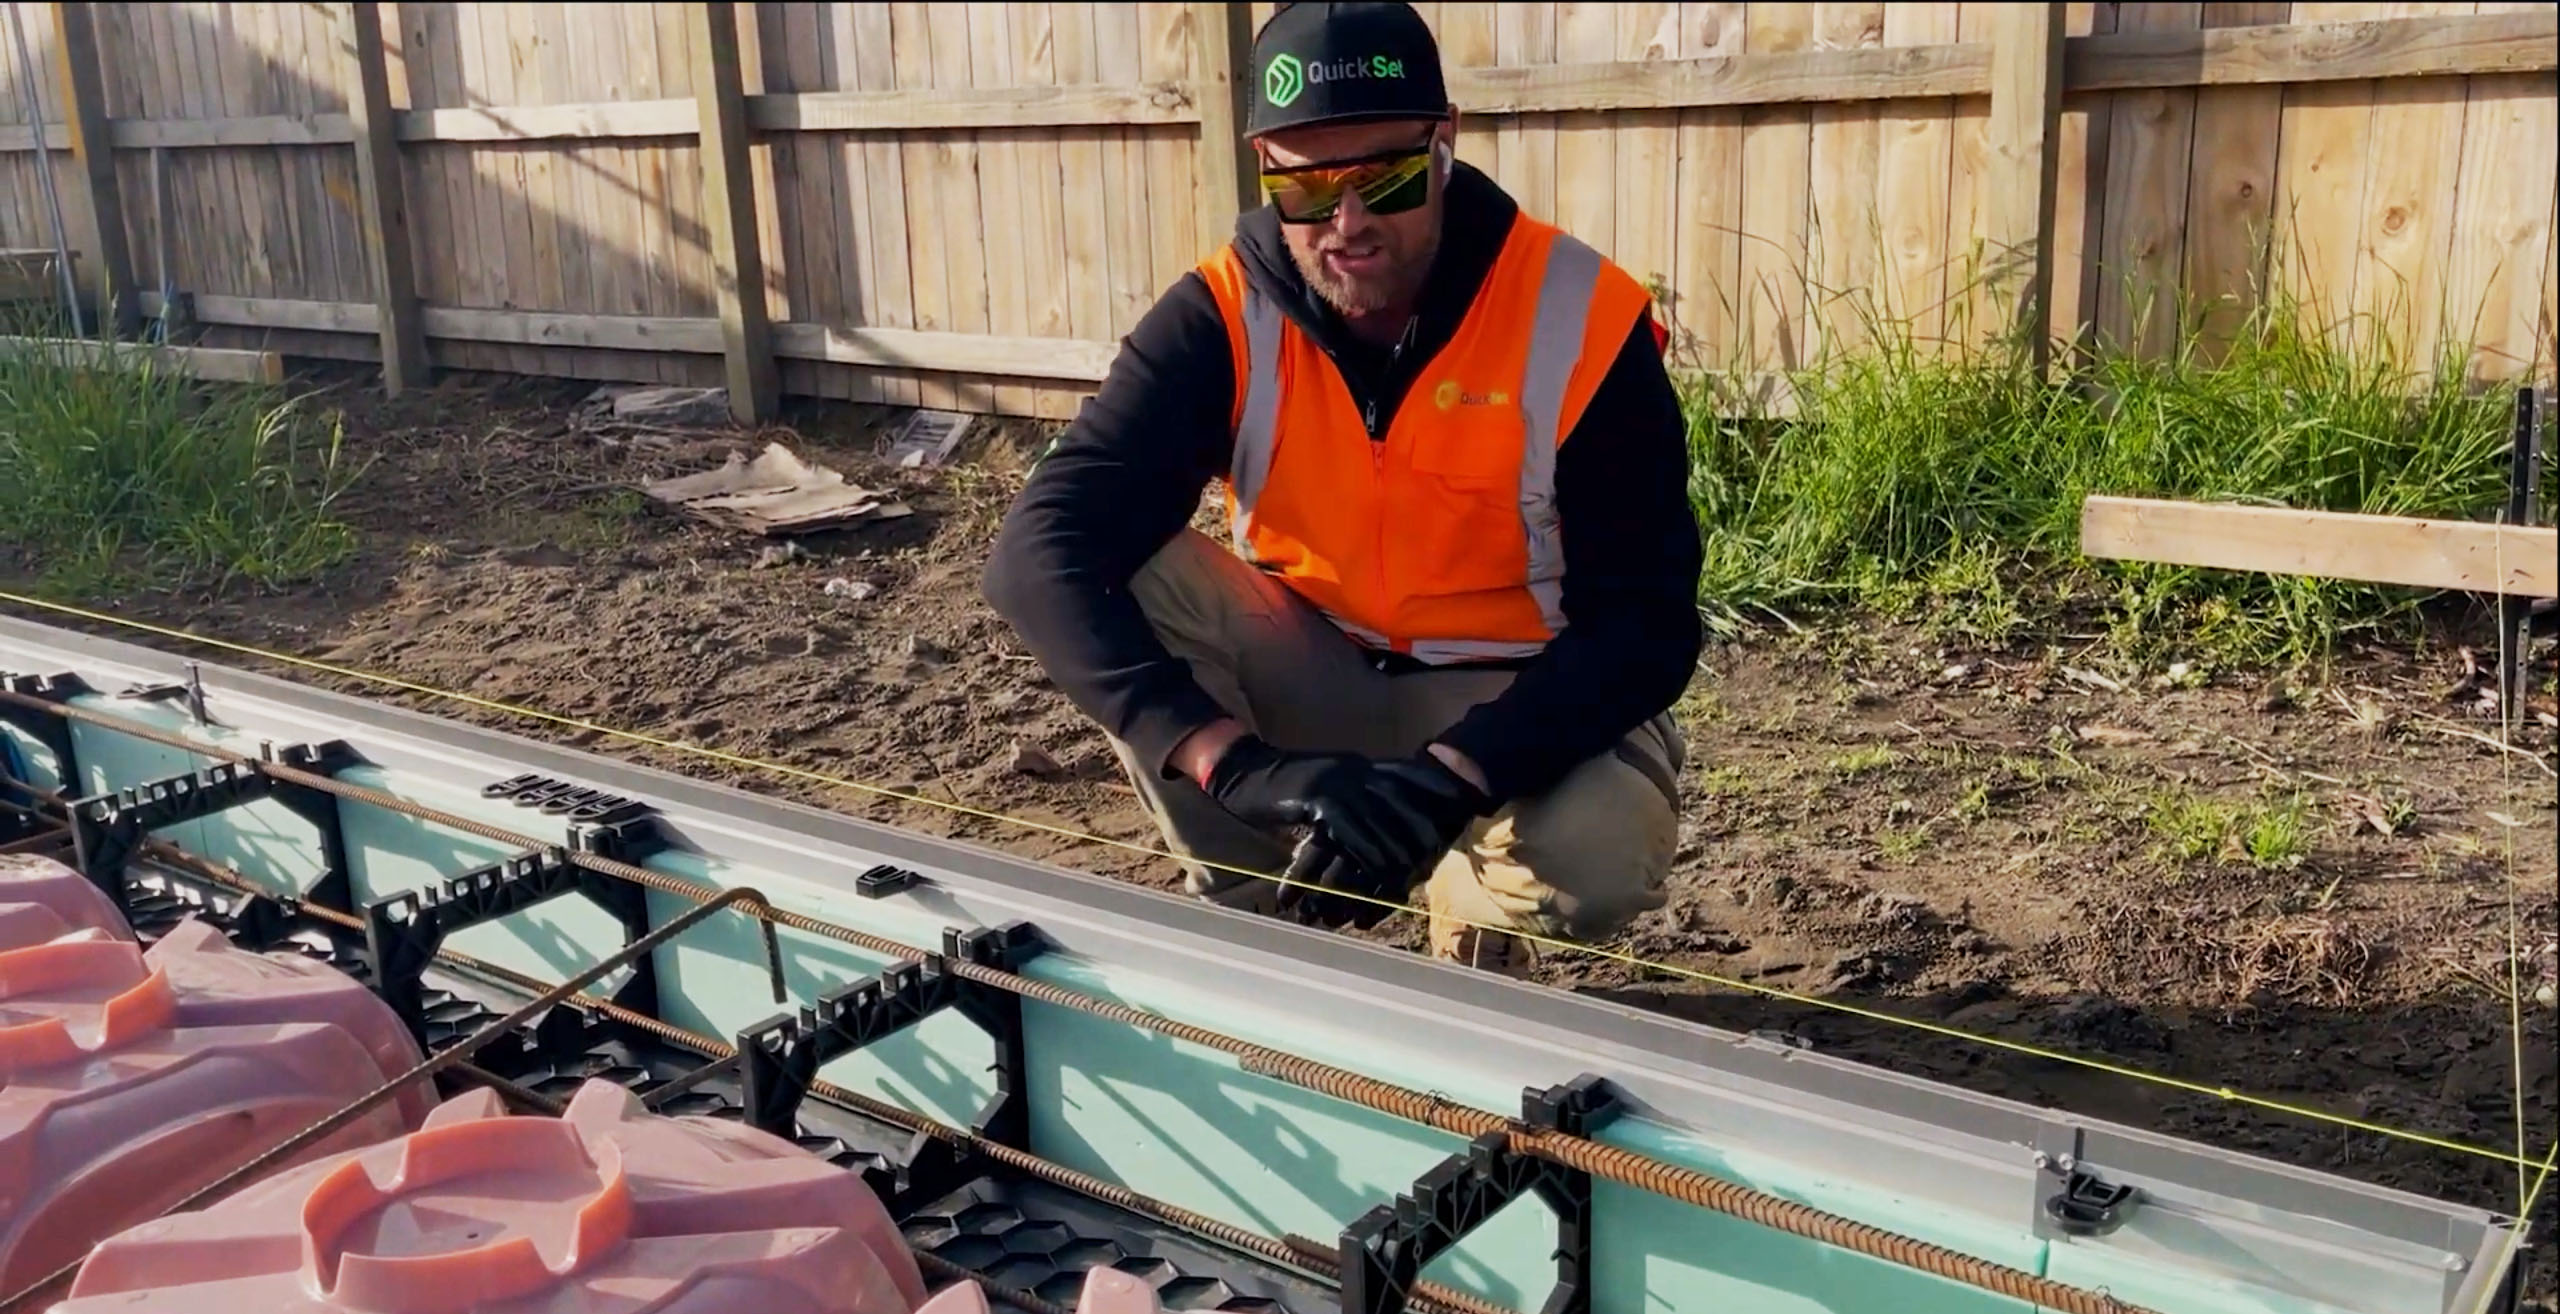
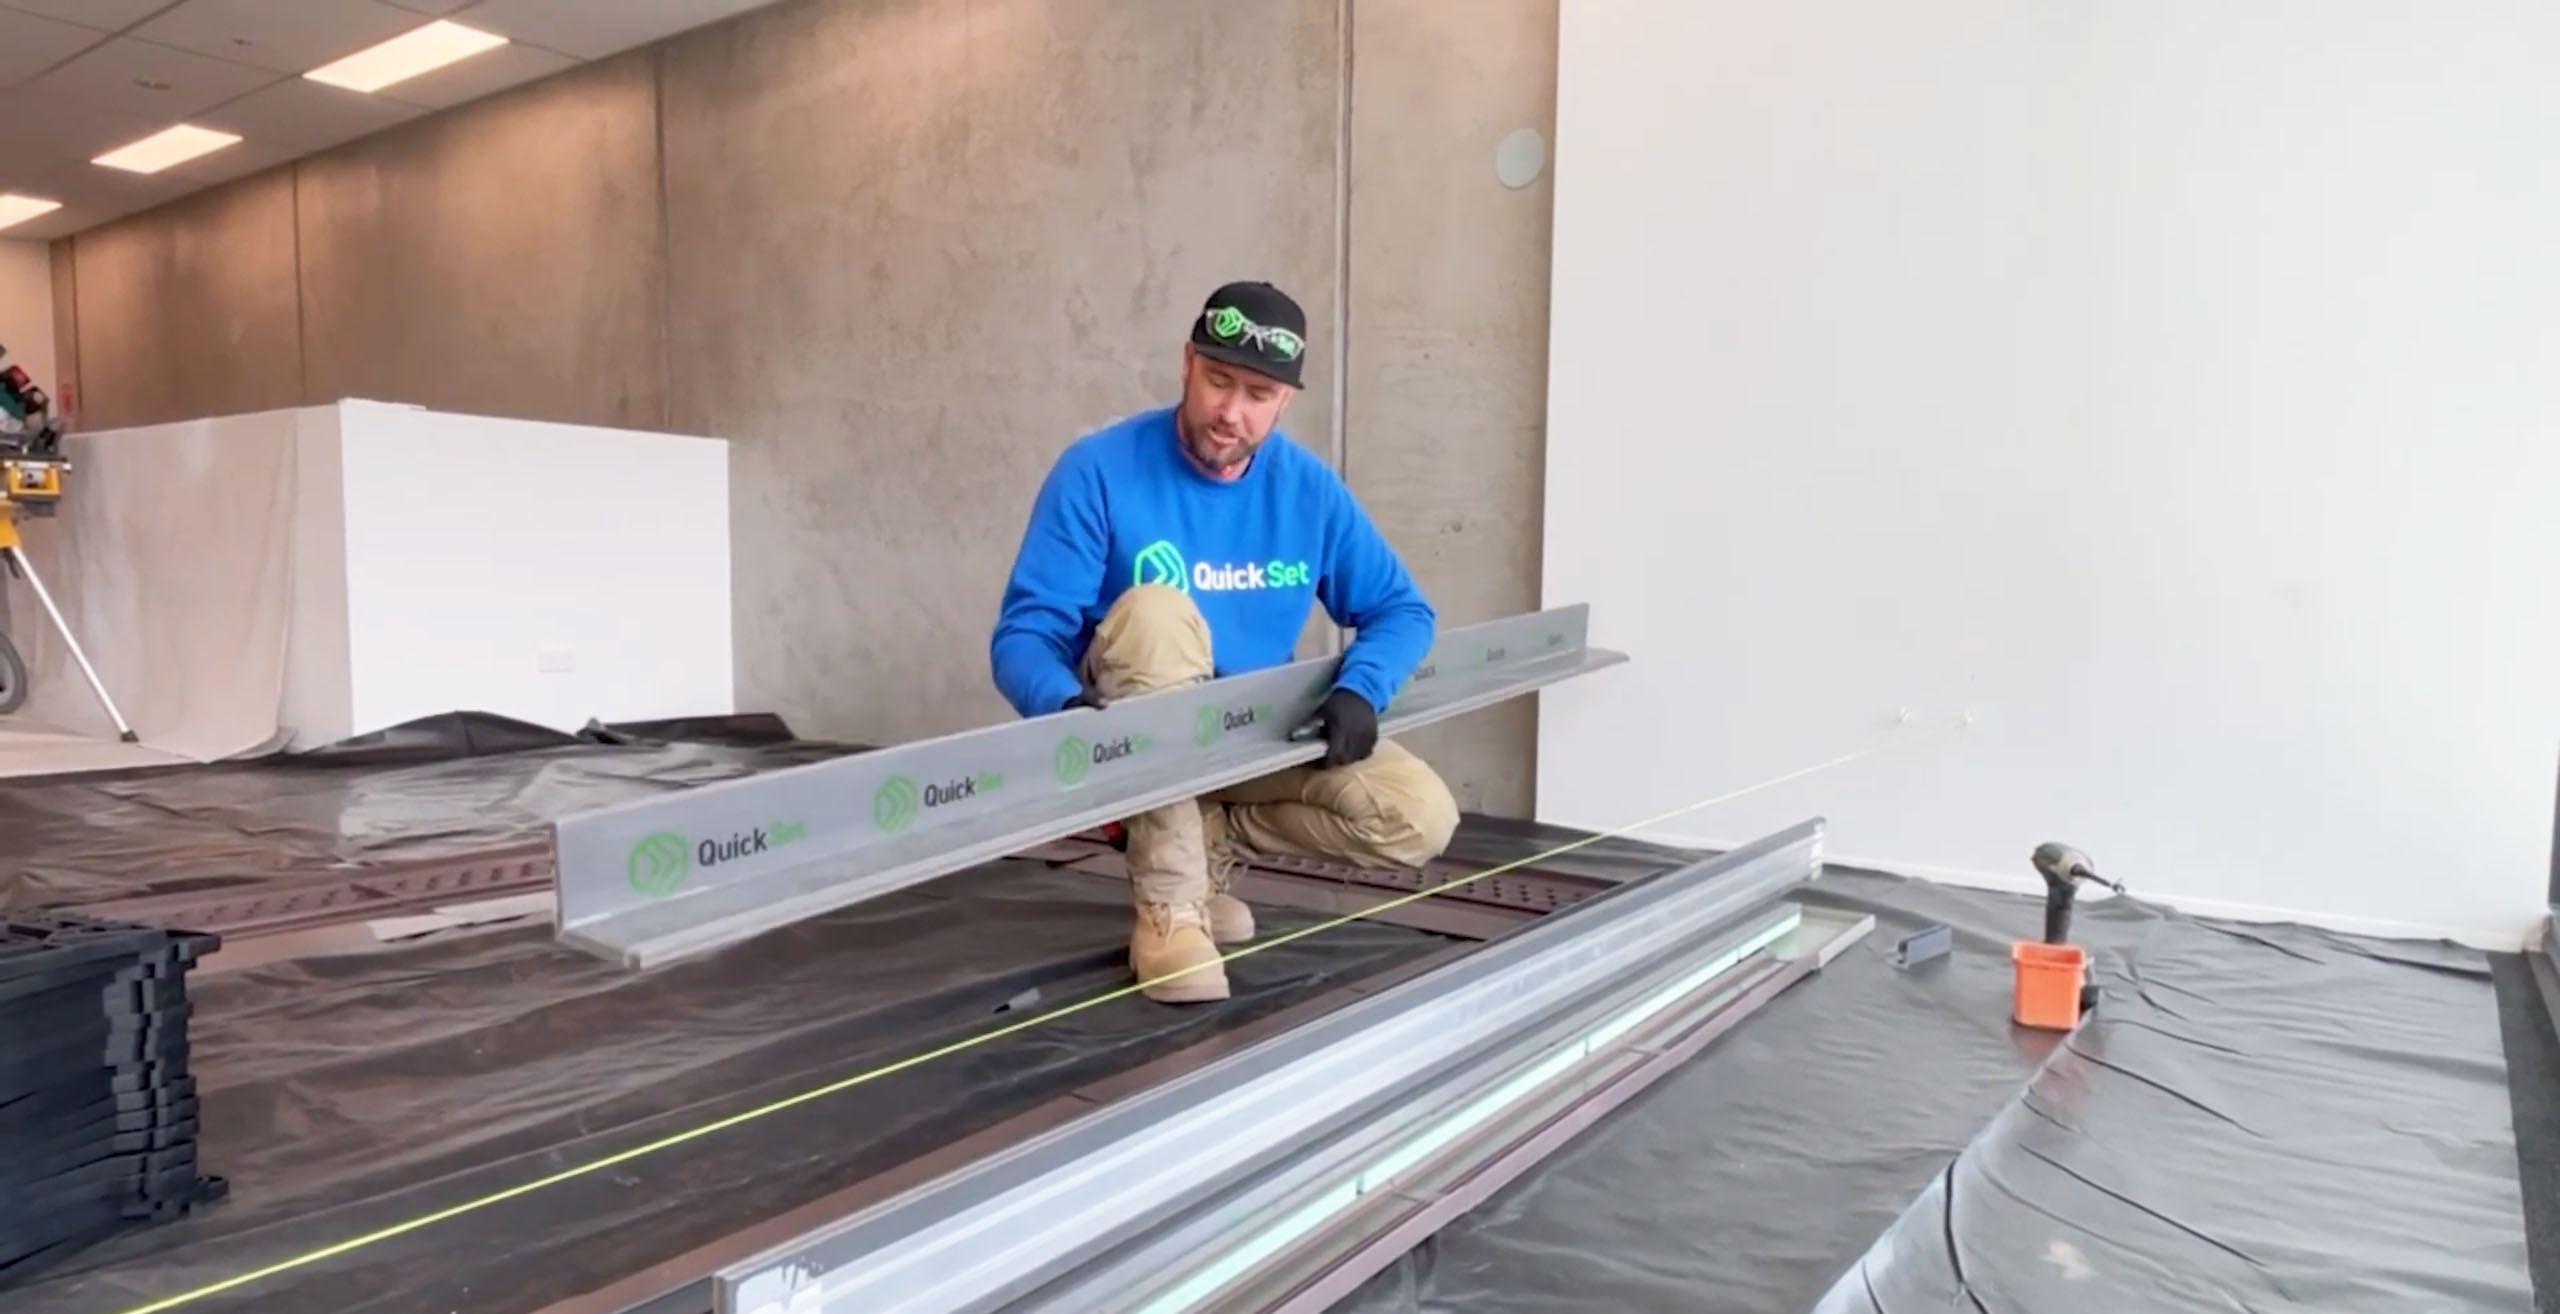
This section covers the process of feeding the steel reinforcement, including the corner steel (L bars), top steel, and laying and tying the mesh.
The section outlines the steps for preparing and installing the steel reinforcement, which is used to strengthen the concrete structure and ensure its stability.
This section provides comprehensive instructions for feeding and installing the steel reinforcement and tying the mesh, and is a critical step in the QuickSet system installation process.
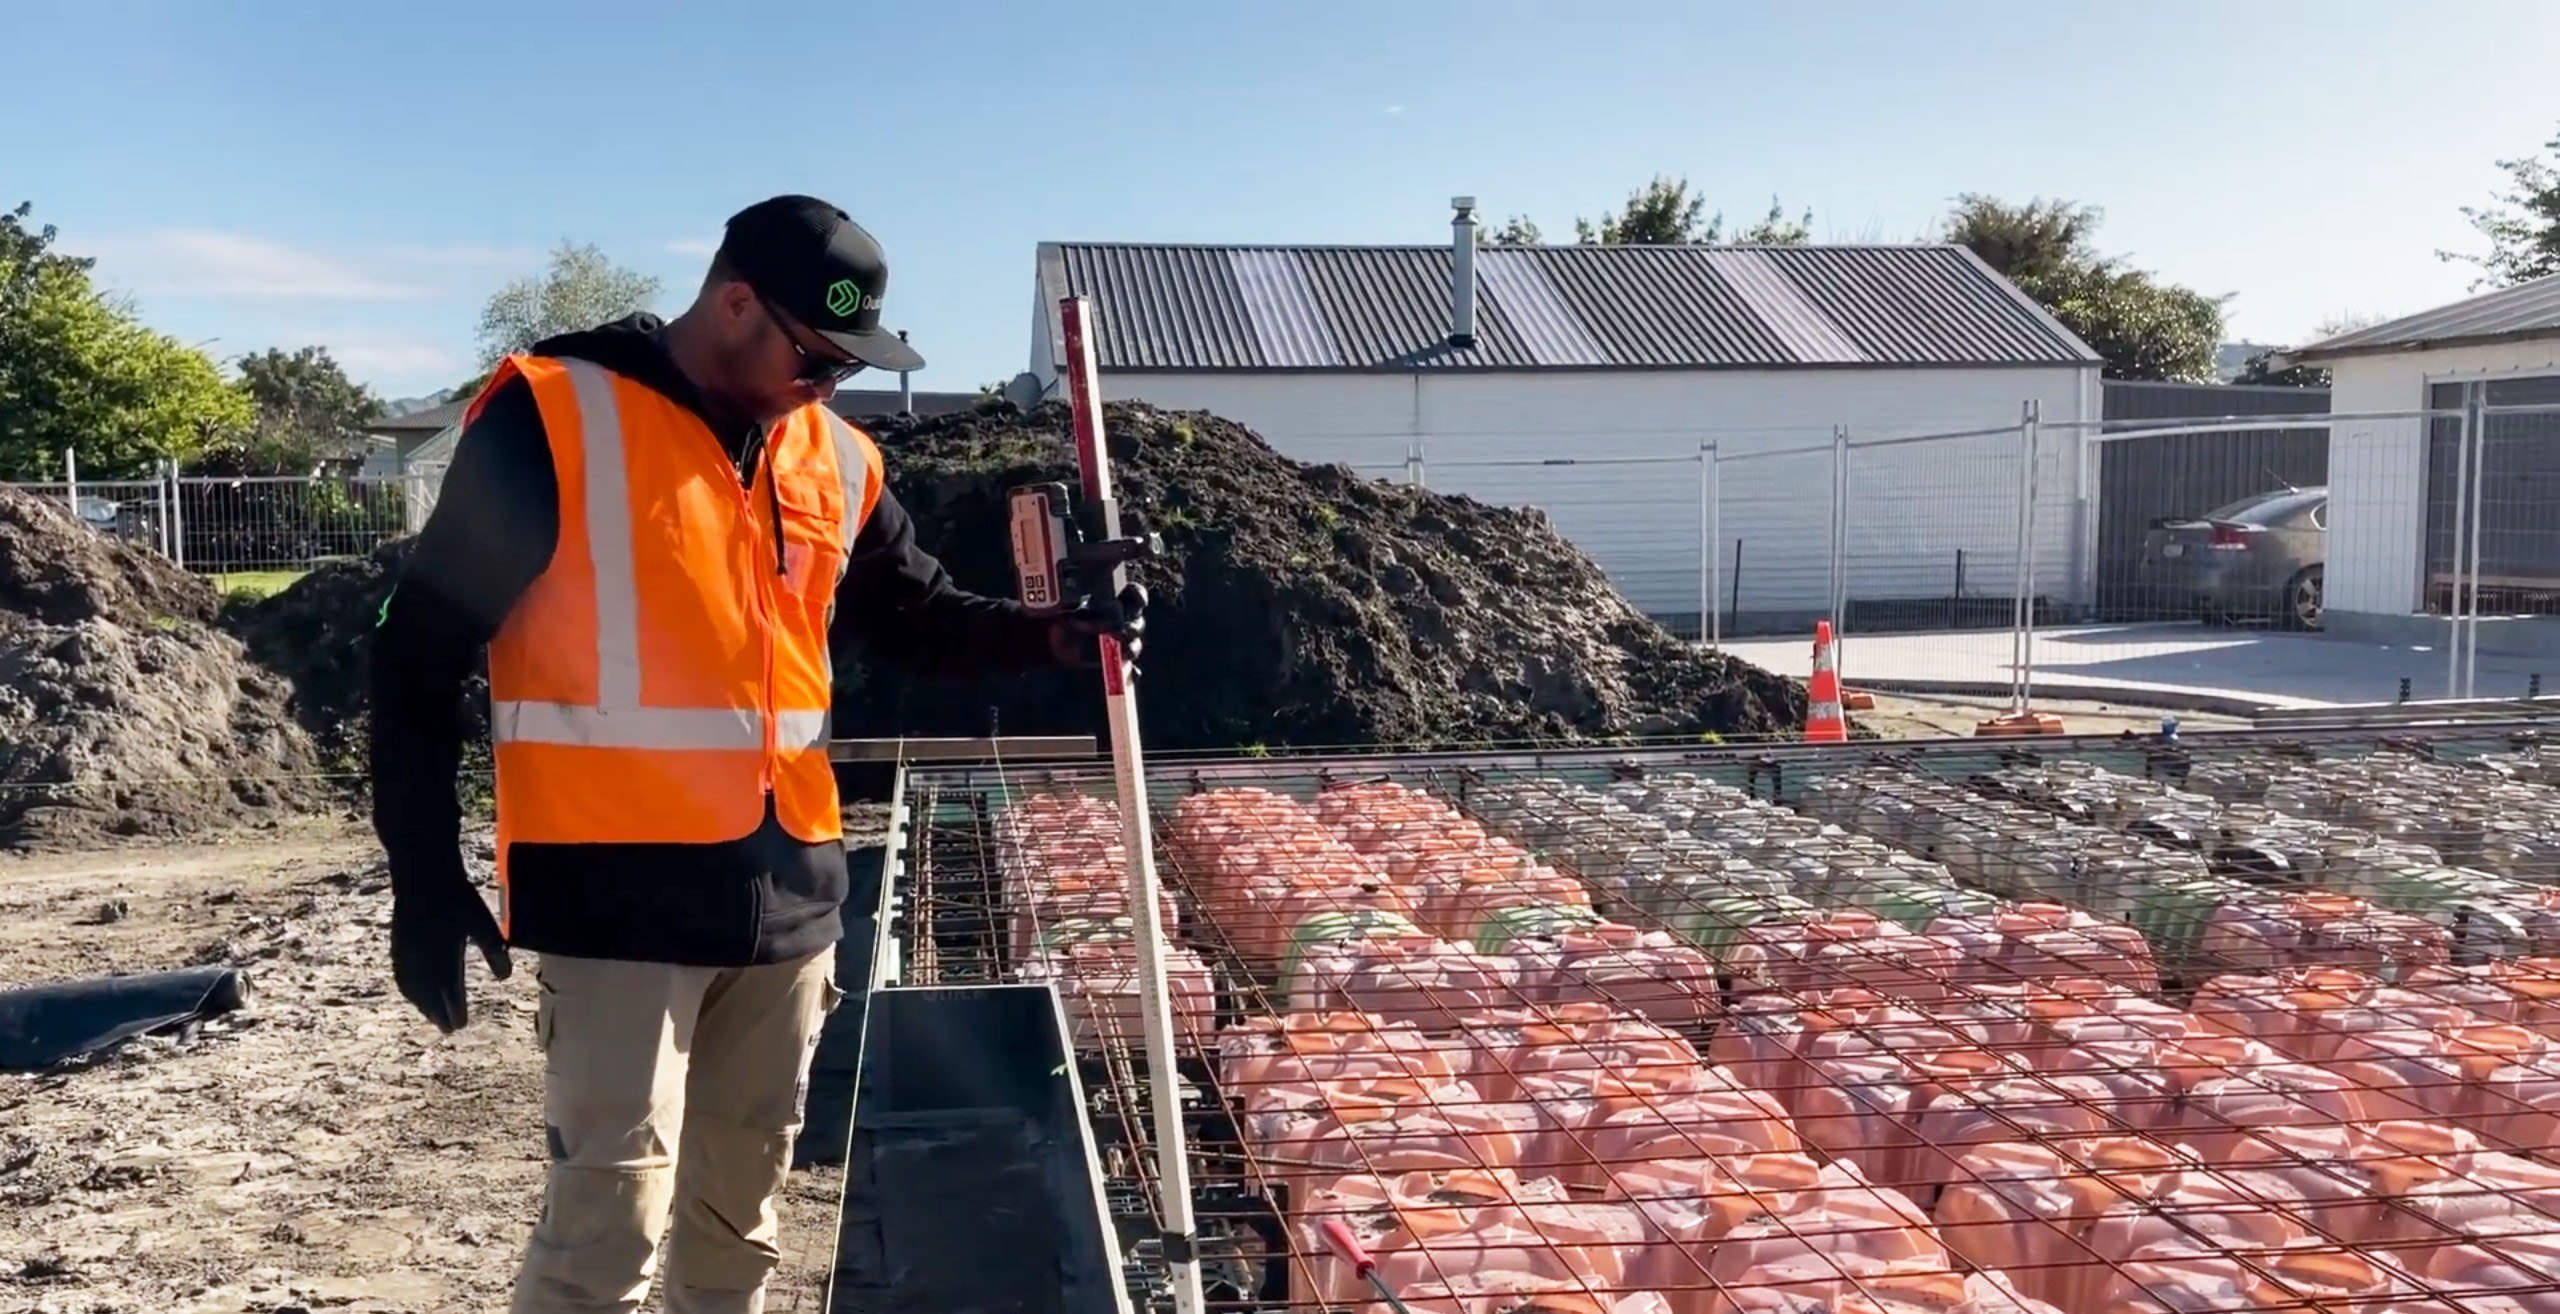
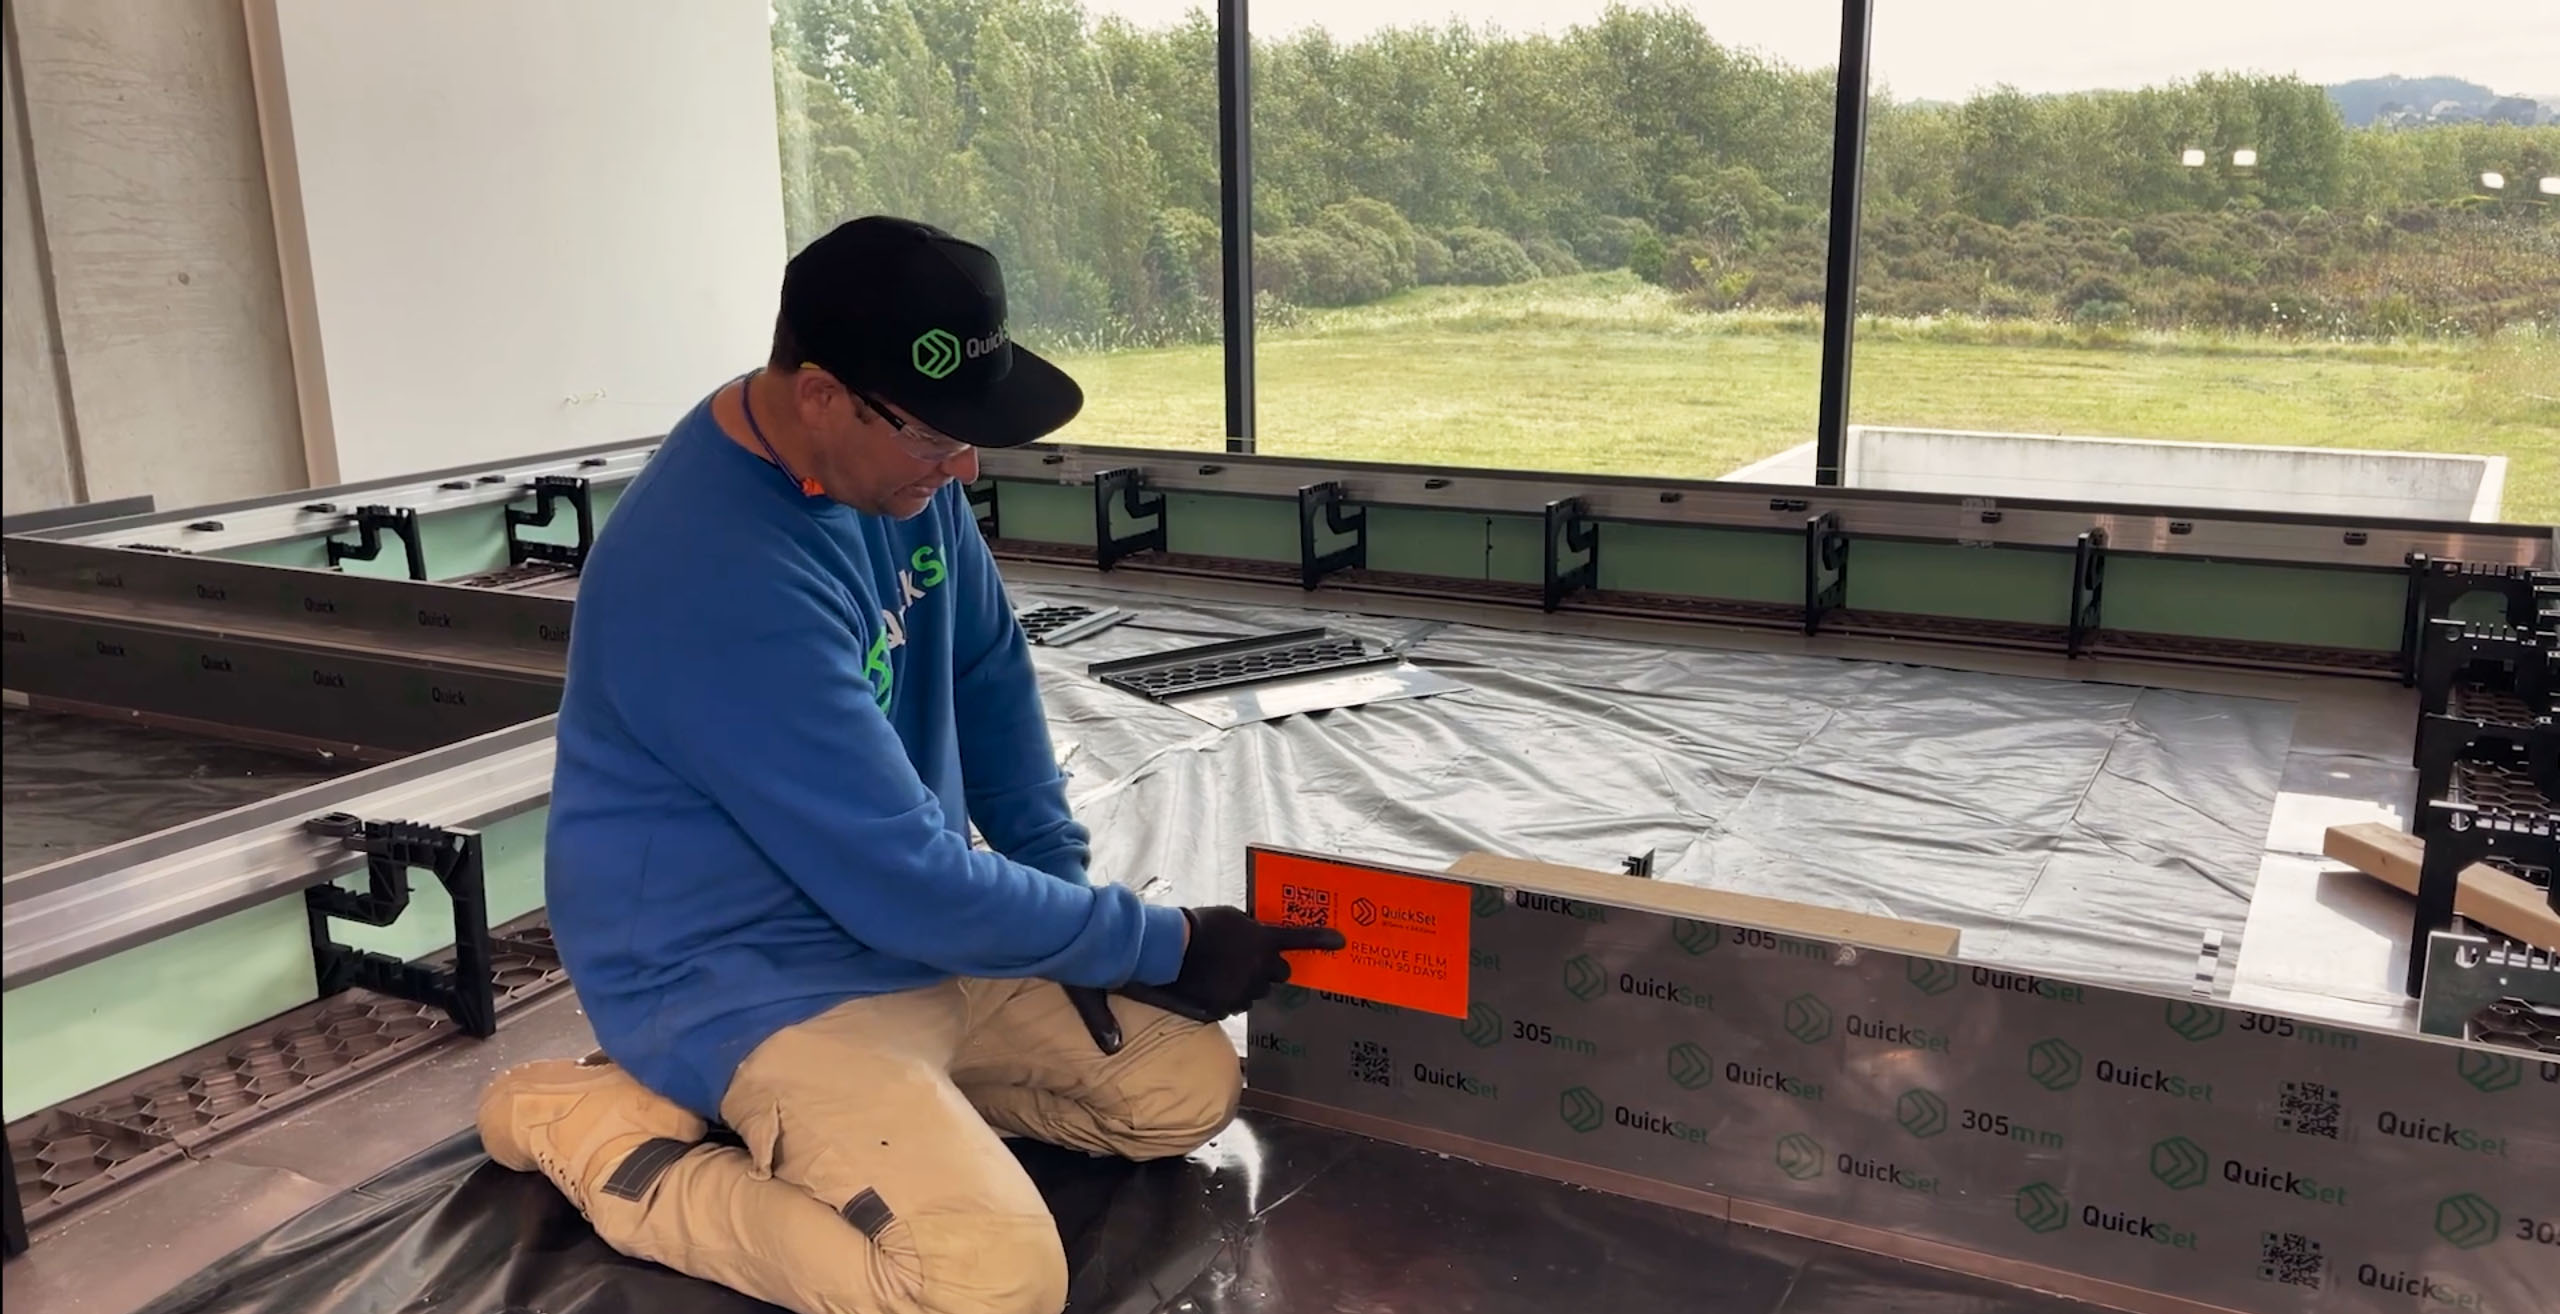
This section covers the process of heightening and lowering the QuickSet system after the mesh has been laid.
The process involves measuring and adjusting the height of QuickSet, either by adding or removing material, to ensure that it is within the correct tolerance range.
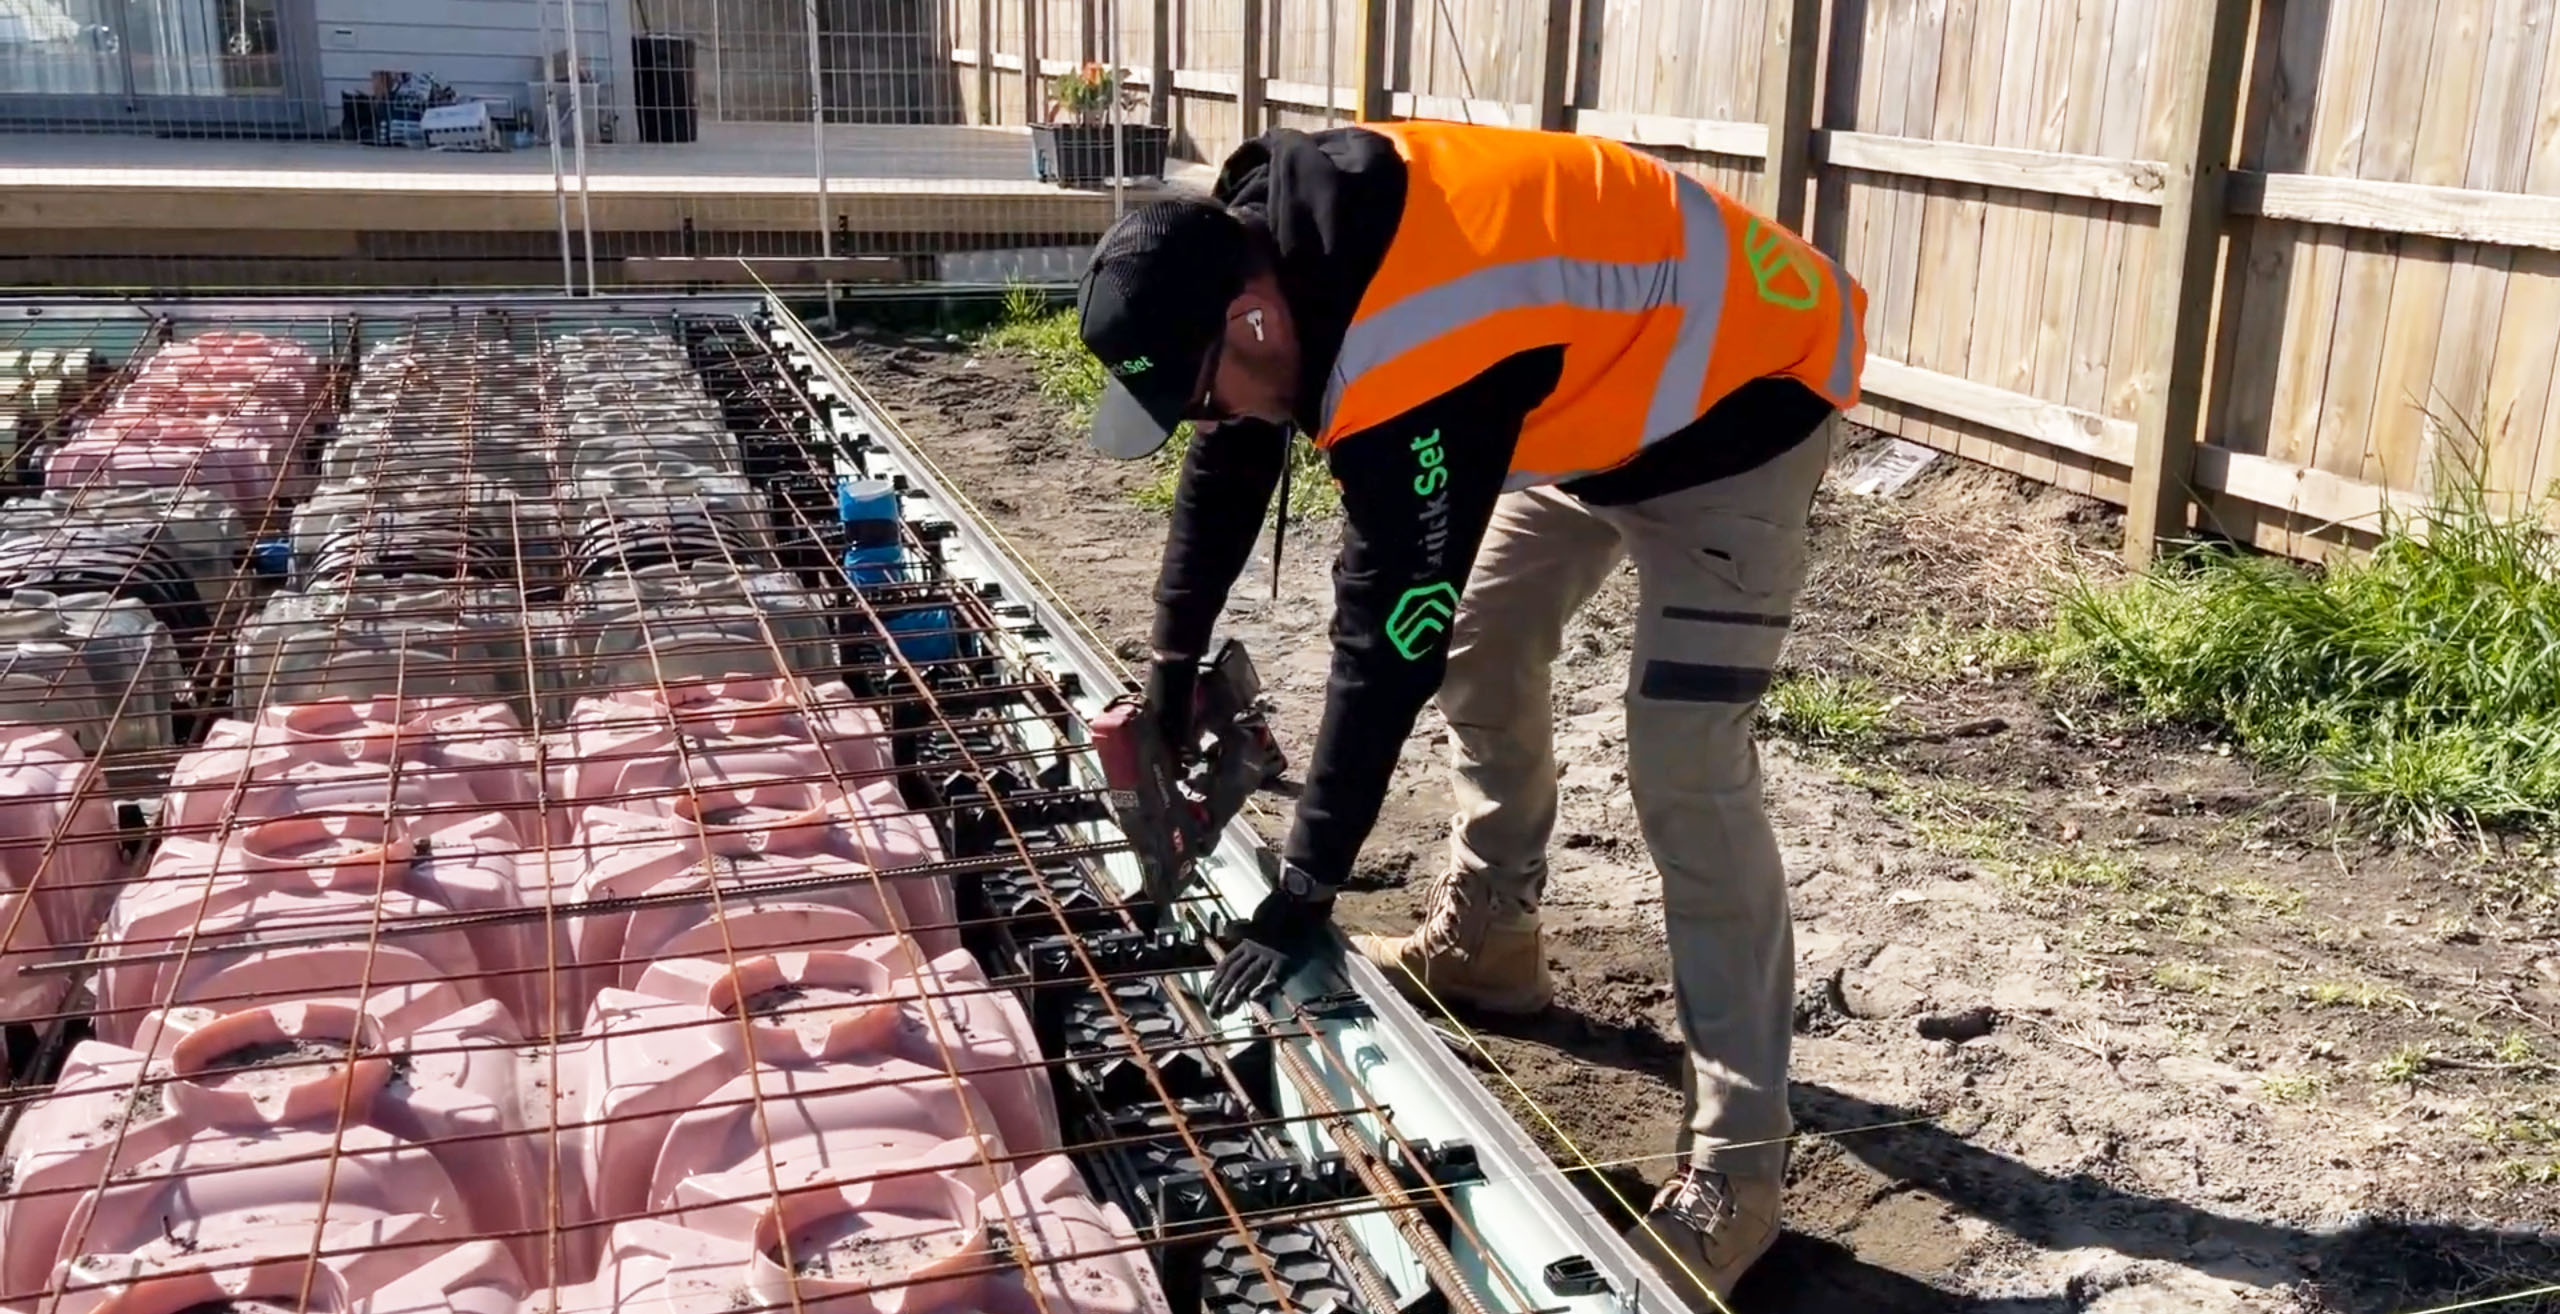
This section covers the process of tying the system with cable ties, pulling the form together using stringlines as a guide for straightening. The section outlines the steps for securing and aligning the QuickSet system to ensure that it is properly installed and ready for the next stage of the construction process.
Section 9 of the QuickSet system installation guide focuses on the QuickSet Brick Rebate, its use in corners, cutting, and placement.
The section explains the steps for cutting the rebate, how to place it in corners, and how to place the rebate stirrups. The importance of staggering the joins of the rebate is emphasized, as well as the process of making mitre cuts and using rebate clips.
The QuickSet Brick Rebate is a key component in creating a smooth transition between the QuickSet system and the brickwork, and this section provides clear instructions for cutting, placing, and using the rebate, ensuring proper installation.
Section 10 covers the process of connecting brick rebates to other QuickSet products, such as a standard forms, internal brick rebates, or straight walls.
The steps involved in creating a wing wall include cutting a straight base to size, cutting two external corner bases, and joining them with the upstands from two separate bases to form the wing wall shape.
A flap is added to stitch the whole structure together and is secured with glue and screws.
Once the glue dries, the wing wall is formed and the screws are trimmed with an angle grinder.
Section 12 covers window and low-profile rebates. It explains the two options for window rebates and how to install them, as well as how to install the low-profile form for garage door rebates.
The maximum depth you can cut a rebate is also discusssed in this section.
This section of the installation guide covers custom cuts, specifically custom base cuts and angled form cuts.
It provides instructions for making cuts to the base or form units to fit specific design requirements, ensuring a proper and accurate fit in unique or irregular shaped spaces.
Section 14 covers pipe and pile penetrations. It provides instructions for drilling through QuickSet formwork for plumbing purposes, typically with a distance of about 100 millimeters from the top to avoid weakening the system.
It is important to use a mastic sealant with a UV stabilizer to prevent moisture from entering the system after drilling the hole.
Additionally, the section covers cutting QuickSet bases to accommodate pipes and suggests using an angle grinder. It highlights the need to use additional support, such as a peg or brace, if cutting the base weakens the product too much.
In particular, common sense is needed to ensure the system remains strong enough to withstand pressure from the concrete.
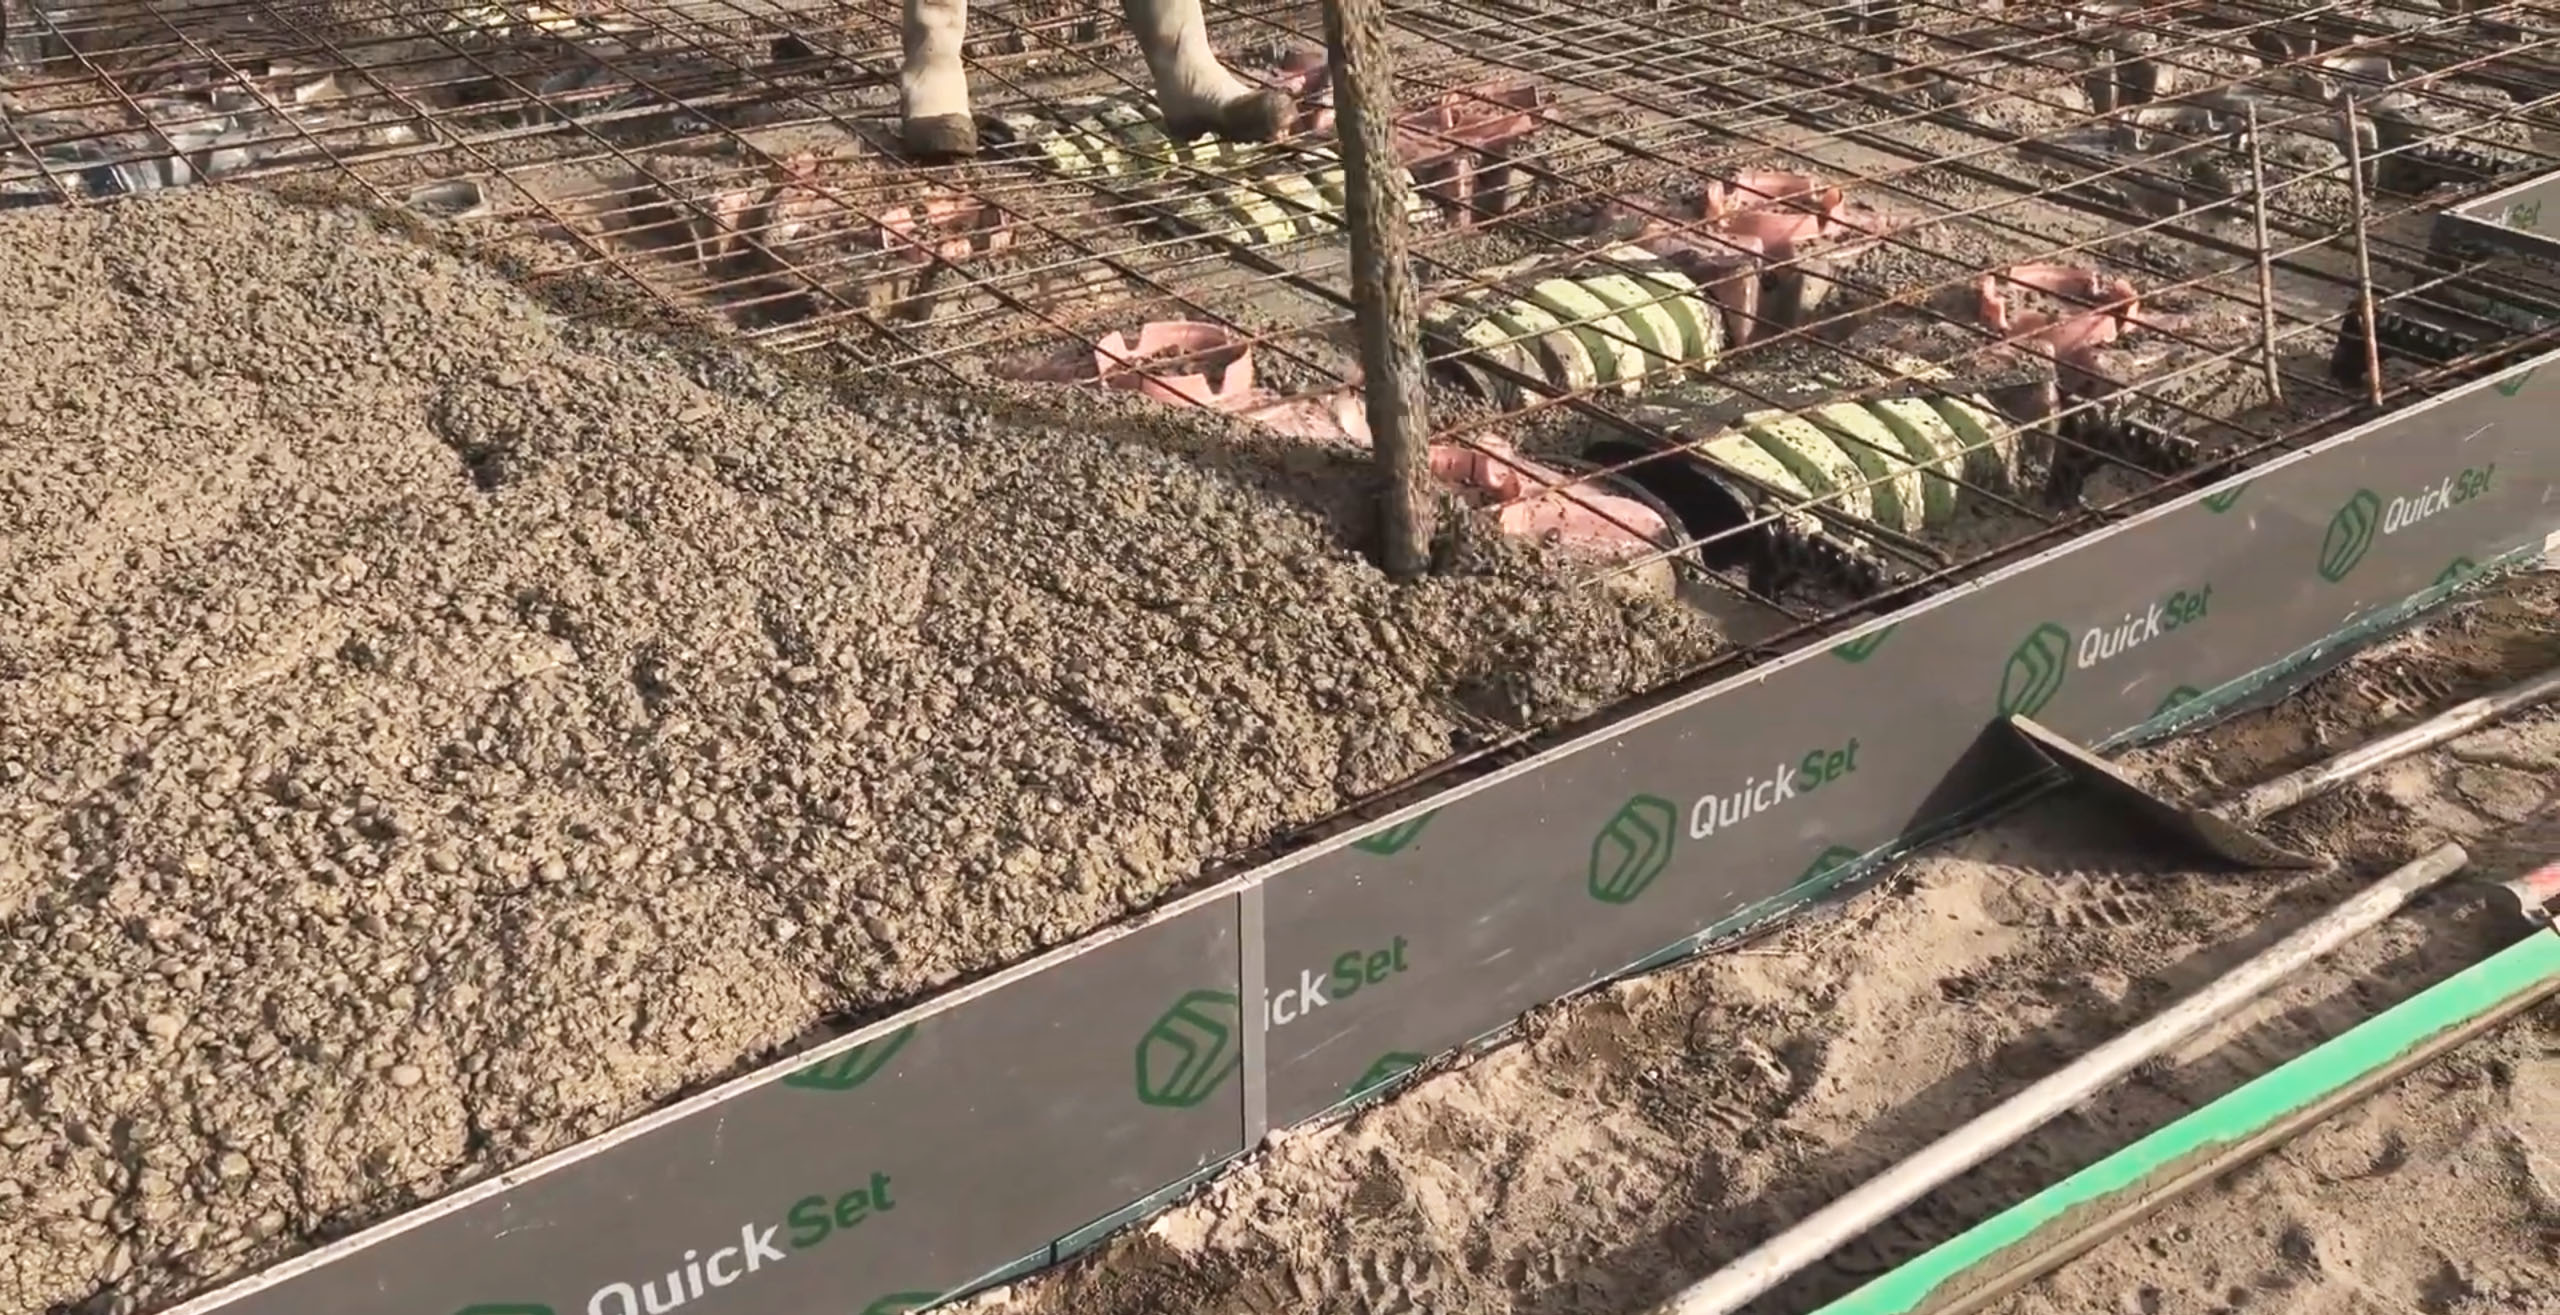
This sections is dedicated to pouring concrete, including the steps for pouring lows and bringing the concrete topping/slab up.
The section provides guidelines for the concrete pouring process, including the proper sequence of steps, tips for ensuring a smooth and consistent pour, and advice for dealing with any potential challenges that may arise during the process.
The goal of this section is to help installers pour concrete in a way that ensures a stable and secure QuickSet system, with a smooth and level concrete topping/slab.
This section offers comprehensive guidance on repairing the QuickSet system, ensuring seamless fixes for any damage encountered during the building process.
Our goal is to equip installers with the necessary techniques and methods for efficient and effective QuickSet foundation system repairs.
The final section of the guide provides tips and recommendations for using the system effectively.
It emphasizes the importance of following the best practices mentioned in this video library for optimal performance and lists certain limitations that users should be aware of.
The section also serves as a disclaimer, highlighting the need to follow the best practices mentioned here and to use common sense when working with QuickSet.